

Chances are, your Swiss Army knife is one of your most frequently used camping tools.
So, if you don't maintain it with care, it won't be able to perform like you need it to..
Professional knife maintenance can be expensive and difficult to master.
But, here's the trick:
With the right knowledge, anyone can service their Swiss Army knife quickly and cheaply.
With the proper care, this tool can last for generations. So, read on to learn everything there is to know about how to clean a Swiss Army knife.
Let's dive in!
What Not To Do
Before we begin, it is important to note that incorrectly servicing your knife can easily damage it beyond repair.
Here are a few things you should avoid at all costs when cleaning any knife:
WD-40
If you haven't heard the term WD-40, WD stands for "water displacing" and its main use is as a solvent or rust dissolver.
This may surprise you, but WD-40 is not good for Swiss Army knives.
WD-40 is intended for heavy-duty chains, car components, etc, so it is too thick to penetrate well.
Dishwasher
Do not, I repeat:
DO NOT at any cost put your Swiss Army knife in the dishwasher!
This is a surprisingly common mistake; however, the detergents used in the dishwasher can cause your knife to stop working. (Also, it is not good for the casing.)
Bleach
Bleach is too hard and will cause scratches on the blade and hinges which will make the knife more susceptible to jamming.
Sandpaper
You won't be shocked to hear that sandpaper is not good for your knife either.
If you've got chunky bits of dirt on your knife, you might be tempted to try and remove them with sandpaper. I'll be brief – don't. The sandpaper will leave scratches on your knife, which you won't be able to get rid of.
Rust Remover
Rust removers are not designed for smaller tools like Swiss Army knives. So you should avoid these, too.
As I mentioned before, WD-40 is not good for your knife, and any other rust remover will have pretty much the same effect.
It will do your knife more harm than good.
Tools Needed To Clean A Swiss Army Knife
We covered what NOT to do.
But before we dive in the proper way to clean your knife, here are the items you're going to need:
- Dish soap
- Brush (an old toothbrush will do)
- Lubricant – mineral oil works best
- Q-tips
- Lint-free cloth
- Newspapers or rags
How To Clean A Swiss Army Knife – A Step-By-Step Guide
Now that you've gathered the tools needed to clean your knife, let's go through the cleaning process, step by step.
Step 1 – Remove The Knife's Scale Tools And Electronics
Before you start cleaning, you need to remove the scale tools from your Swiss Army knife. This includes the toothpick, needles, and tweezers.
If your knife has electronic components, such as a flashlight or any other USB components, remove them if possible before cleaning. If your model has batteries, remove them too.
Swiss Army knives' electronic components usually aren't waterproof. So if you get the knife wet before taking out the electronic components, that'll be the end of them.
Step 2 – Fill Your Sink Halfway With Warm, Soapy Water

When you have successfully taken out any electronics and scale tools from your knife, fill a sink or a large bowl with warm, soapy water.
Fill it up to the point where you can submerge the entire knife beneath the surface of the water.
When doing this, make sure to use regular dish soap. As I mentioned, bleach and other harsh cleaners can harm the knife.
Step 3 – Brush Away The Dirt And Gunk
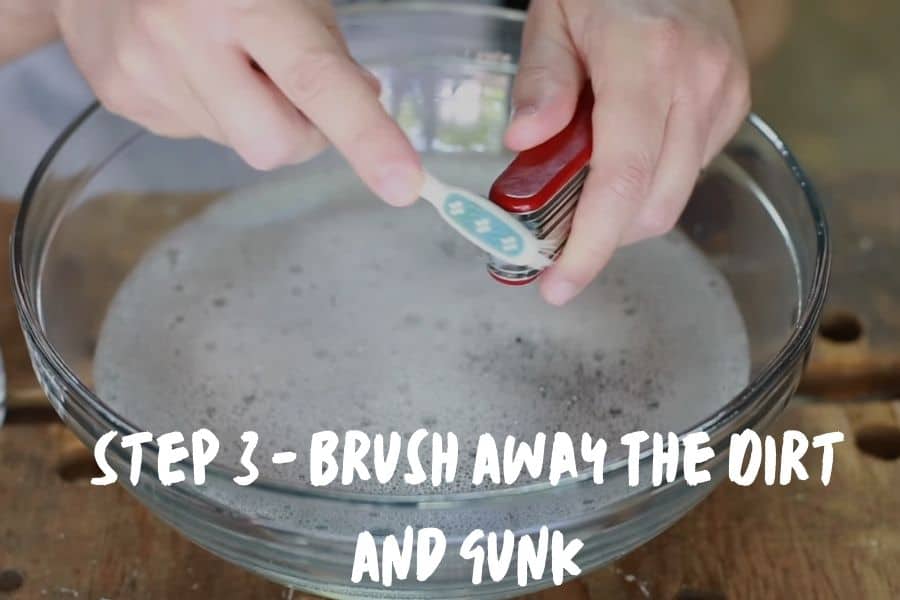
Before submerging your knife into the water, remove any loose fuzz, dirt, or gunk that has accumulated on the knife's joins and hinges with an old, dry toothbrush.
If you have a Swiss Army knife with a back layer of tools, clean them as well.
This does not have to be perfect; simply remove the stuff that comes off easily.
Step 4 – Open The Front Tools And Clean The Inside Of The Knife
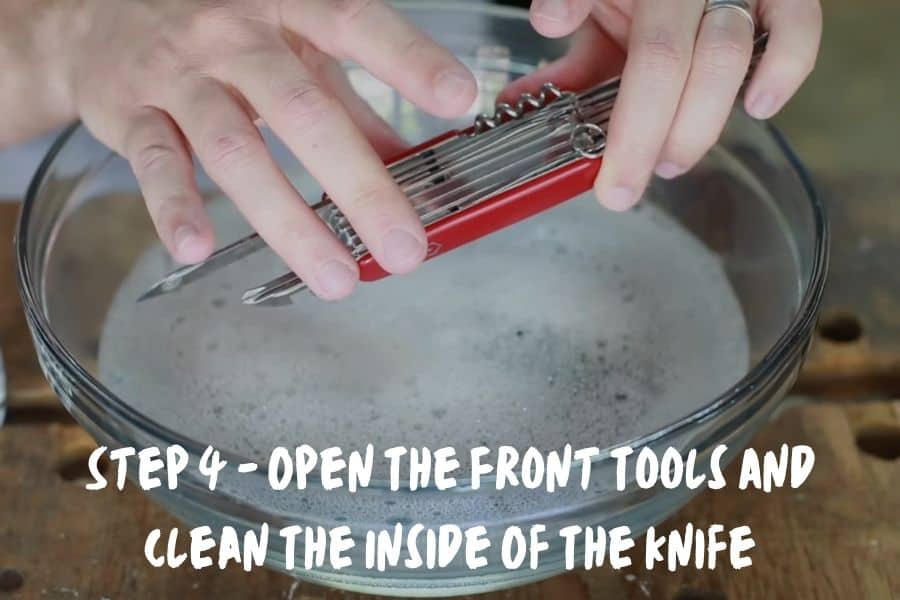
The next step is to open the front layer of tools. Front tools are on the side where the main blade is.
If your model comes with a variety of tools, begin with the can opener and bottle opener and work your way forward. This will make the knife blades the last thing you open, reducing the possibility of cutting yourself.
After you've opened all the tools, soak the entire knife in warm soapy water.
Remove any fuzz from the inside of the knife using the brush. Take extra care to remove as much grime and other debris as possible from the tool's hinges.
Using dish soap can assist you in removing any old oil that may be holding debris. If you have any tools that are stuck badly, you may need to open and close them while submerged. Brushing the hinges of the tools while they are half-open may also help.
After thoroughly cleaning the inside of the knife and its hinges, dunk it in the water a few times and carefully close the tools. Begin by closing the tools with the knife blades and work your way up.
Step 5- Clean The Scale Slots And Back Tools
After cleaning the front tools of your pocket knife, repeat the process to clean the tools on the back.
Here's the trick:
While you are opening and closing the tools, clean the tool hinges. When you're finished, close the tools.
If your knife has scale tools, such as a toothpick, needles, and tweezers, use a pipe cleaner to clean out any debris that may have gotten stuck in their slots. It's super simple – just put a wet pipe cleaner into the slots and scrub.
Step 6 – Rinse Your Knife
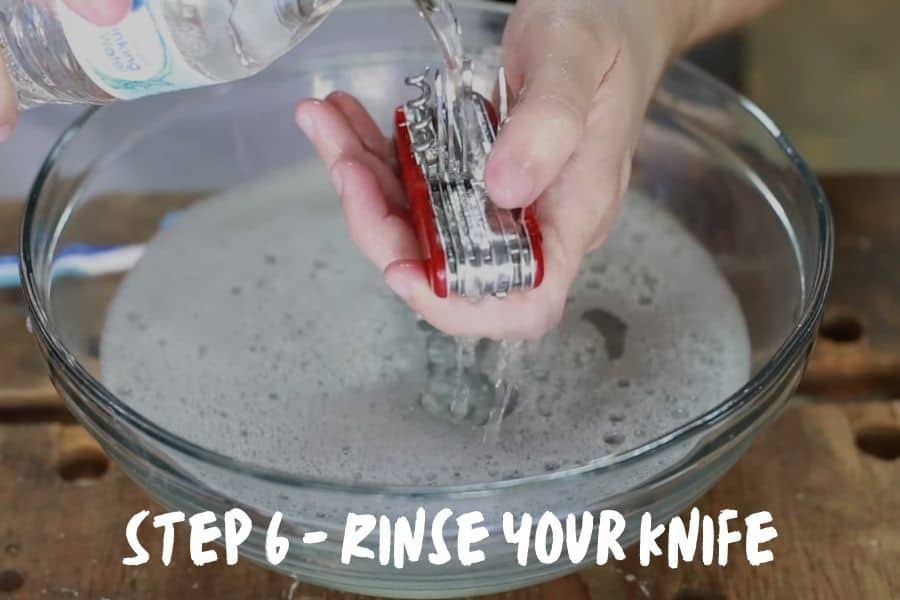
Done scrubbing the inside of your Swiss Army knife and its hinges?
Great!
Now it's the time to rinse it thoroughly.
You can do this with your sink's faucet or a bottle of water.
As you do this, open and close the tools to help remove all the soap that might still be inside.
Be sure to rinse out the scale tool slots to remove soap residue from them as well.
Step 7 – Dry Your Swiss Army Knife
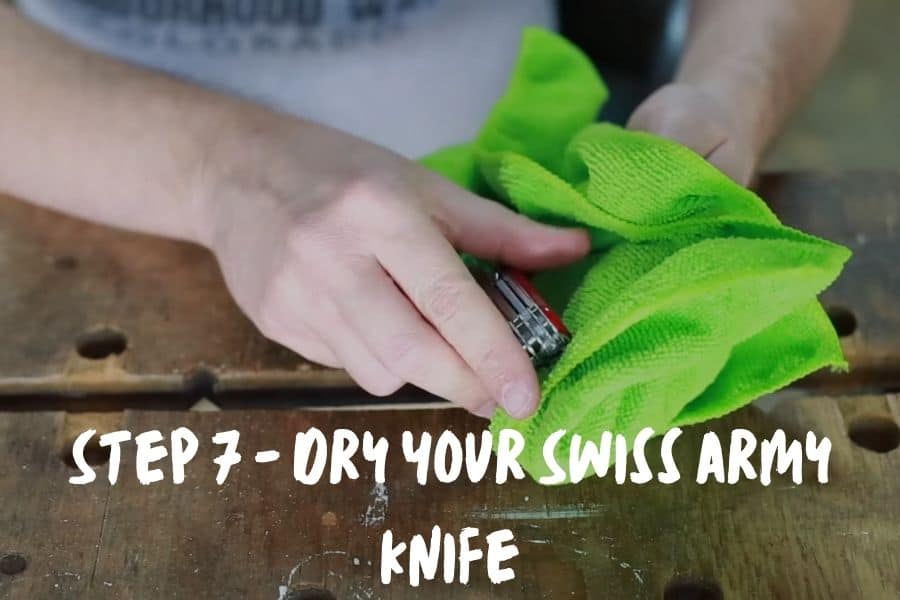
Remove as much water as possible from your knife with a lint-free rag. Each tool, as well as the inside of the knife, should be thoroughly dried.
You won't be able to remove all the water, but getting as much out as you can will help prevent water spots on your knife.
After you've removed as much water as possible, place your knife in the sun or in front of a fan. This will dry out any water that has accumulated beneath the knife's scales and between its layers.
Step 8 – Oil Your Knife
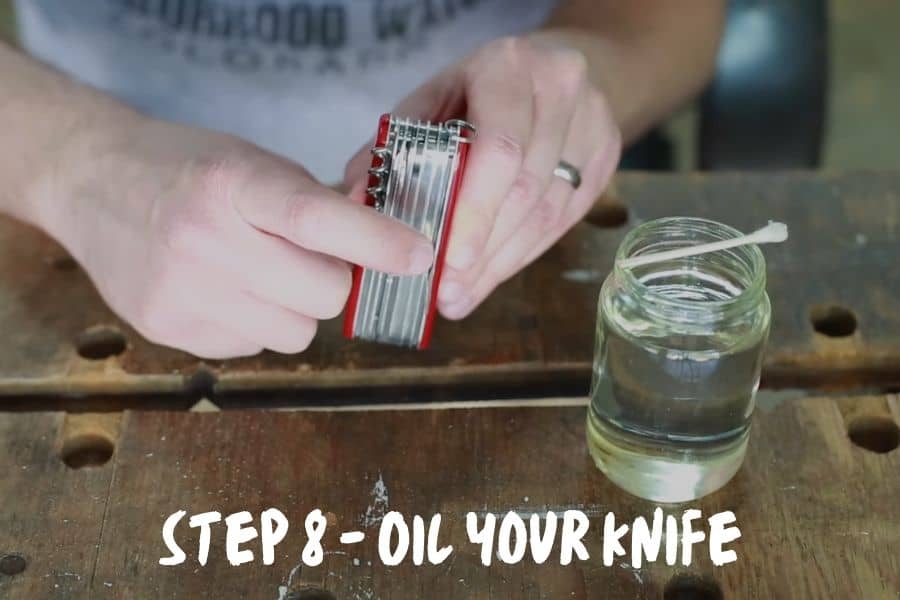
After your Swiss Army knife has dried, it will need to be lubricated.
Any previous oil on it has most likely been washed and scrubbed away. If the hinges are not oiled, the knife will be difficult to open and may rust.
I'll be honest:
Oiling your knife can be messy, so place newspapers or rags on the surface you'll be using to oil your knife.
Most Swiss Army knives are intended to be used near food, so I strongly advise using a food-safe lubricant. Mineral oil is a food-safe sure option.
When lubricating your knife, apply a small amount of oil to the hinge of each tool. You don't need to use much.
If your bottle lacks a nozzle, apply the oil using a Q-tip.
When applying oil with a Q-tip, flatten one end with pliers and snip the other end off. You should flatten that also. This allows you to use both ends to apply oil to narrow hinges.
After applying the oil, open and close each tool several times. This will evenly distribute the oil and work it into areas that you couldn't reach.
Step 9 – Clean Up Any Excess Oil
Wipe away excess oil from the hinges with a lint-free cloth – preferably one made of microfiber. This will leave just enough oil to protect and lubricate the knife without making it a gunk magnet.
While every Swiss Army knife should be lubricated, too much oil can attract dust and other debris. Which, in turn, will eventually clog the knife and make it difficult to open the tools.
So be sure to wipe your knife from excess oil well, but still leave a bit to protect the knife.
FAQ
Whew – that was a lot to cover! Who knew that cleaning a simple Swiss Army knife requires 9 steps?
Despite that, you may still have some additional questions – and don't fret – I have you covered.
Below you will find answers to the questions I get asked the most often about the general maintenance of the Swiss Army knife.
How often should you clean your Swiss Army knife?
How often you should clean your knife varies, depending on how often you use it.
If you use it on a daily basis, you should check it every month to see if it needs cleaning.
If you only use it occasionally, such as a few times a month, then you should check it every six months.
From time to time take a close look at your knife and if it looks like it needs cleaning care, then give it a good spa treatment.
Which liquids can you safely use to clean your Swiss Army knife other than water?
If your pocket knife remains stiff and mucky, you may need to use a solvent.
I recommend isopropyl alcohol, also known as rubbing alcohol. It is affordable, effective, and safe to use on the skin.
You can also put a bit of acetone or ethanol in a bowl of water and soak your knife a few times in it.
HEADS UP! Isopropyl alcohol is a flammable and volatile substance. Use it away from any flame or ignition source (including your phone!) and keep the area you're working in well-ventilated.
What should you do if your knife is dull?
To state the obvious, if your knife blade is dull, you should sharpen it. But you probably already knew that.
What you really want to know is how to sharpen your knife.
Good news: it's a piece of cake. Here's an article I wrote that explains how to sharpen your knife in detail.
What Now?
Now you know how to take care of and clean your Swiss Army knife the way it deserves!
To avoid destroying your knife, avoid all the things I mentioned in the first part of this article.
Be sure to prepare all the tools you'll need while giving your knife a spa treatment.
Enjoy the process of cleaning your knife, doing it carefully step by step as described.
Take good care of your Swiss Army knife, and it will serve you well for many years.
To find out more about cleaning your camping gear, check out some of our other articles, like this one on cleaning your hiking backpack.