


Hiking is a great way to explore the outdoors and soak up the natural beauty.
If you've never hiked before, it might seem intimidating at first. You might think you need specialized equipment and clothing, expensive backpacks, and all the latest gadgets. If you read some hiking blogs, you might get the impression that hiking is a costly hobby and that you can't do it cheaply as a newbie.
Luckily, nothing could be further from the truth, and I'm going to demonstrate that in this hiking guide for beginners.
Finding A Hiking Partner Or A Group
The first question you need to ask yourself is whether you want to go hiking alone or with other people.
There are pros and cons to both approaches, as you can see below.
Benefits Of Hiking Alone
I don't have to tell you that organizing events is difficult even in the best of circumstances. Organizing a hike is even more difficult due to the amount of preparation required. If you go hiking alone, you don't have to coordinate with other people or choose a day that works for everyone.
Another benefit of being a solo hiker is that you set your own pace. You don't have to feel pressured to keep up with more experienced hikers or to slow down for people who are not in the best shape. You're entirely free to roam and explore as you wish. You can also rest when you want and take as much time as you desire.
Finally, there's something magical about being completely alone in nature. Hiking solo will allow you to get away from the hustle and bustle of the city life and leave you alone with your thoughts.
It'll also build resilience. There isn't a better confidence booster than being alone in the wilderness, entirely responsible for your own wellbeing. Hiking alone will allow you to confront your fears and weaknesses and come out a better person.
Benefits Of Hiking With Partners
While solo hiking is fantastic, hiking with partners has its benefits too.
First, it's a lot safer.
This is a no brainer.
Dangerous wildlife, injury, or getting lost – hiking is not without its dangers. And while most of the risks are way overblown in the news, it does help to have a buddy or two when you go on your adventure.
Whether it's having two sets of hands to help out or a more experienced person to guide you, the truth is that there is safety in numbers.
Next, hiking in a group could be more fun. Some of my fondest memories are of my friends and me, hiking a mountain and just taking in the scenery around us. While solo hiking can build more character, hiking with others will lead to more laughs and fun times.
Lastly, there's the question of motivation. When you're just starting out, it's easy to feel overwhelmed, especially on your first hike. You might even feel like giving up less than half an hour in. Having a friend there to keep you motivated and push through is priceless.
So, should you go hiking alone or with a partner?
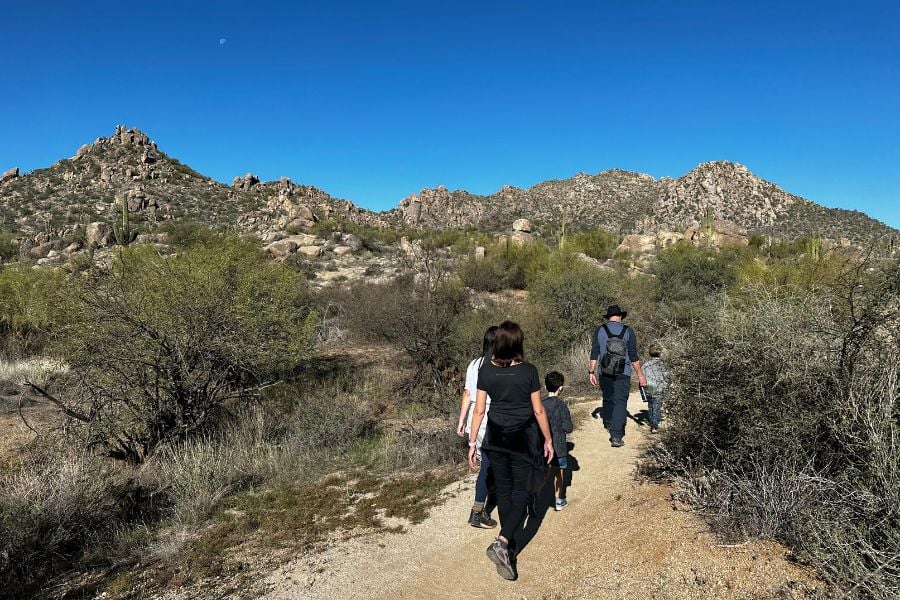
Since you're a beginner, I strongly advise you to go hiking with a partner or a group. It's much safer to go with your buddy or a group.
Later, when you're more experienced and battle-hardened, you can go out alone, but for now, stick to hiking with other people.
How To Find A Hiking Partner
So, how the heck do you find a hiking partner or group?
Obviously, start first with your close family and friends. If you have friends who already go hiking regularly, that's perfect – just ask them to take you on their next hike. You can do the same thing at the office – just casually ask if anyone there is interested in going hiking or enjoying the outdoors over the weekend.
Once you think you found the person who is a good fit, you want to dig a little deeper, ask some questions, and figure out if you two are a good match. Don't think of it as an interrogation – you're just trying to find out if you'd like to spend several hours with that person alone.
What if you have no outdoorsy people amongst your closest friends?
Not a problem.
Here are some of the ways to find new hiking buddies:
- Facebook groups
- Slack groups
- Meetup groups
- Alliance Of Hiking Organizations
And so on.
They are usually super friendly and open to newcomers, so don't be shy.
Of course, when you start hiking more often, you can meet people on the trail and make friends with them. A significant advantage here is that you'll already know how you'll get along with them since you previously spent time together hiking.
Choosing A Hiking Trail
Got your hiking buddy?
Awesome!
The next step is choosing a "Goldilocks" hiking trail – not too hard or too easy, but just right.
If your hiking buddy is an expert hiker, it would be easier to let them choose the trail. However, if they're a newbie like you, then I suggest you follow our advice and pick a route best suited for your abilities.
Don't Bite More Hike Than You Can Chew
The cardinal rule of hiking is choosing a trail that you can actually finish.
The last thing you want is to choose a trail that's too hard, get discouraged, and swear off hiking altogether. You don't want to "bite off more than you can chew."
A much wiser approach is to start easy – choose a beginner-friendly route that will be challenging, but achievable. Then you can start working towards more challenging hikes as you gain more experience.
What To Look For In A Hiking Route
Choosing the right route depends on many variables. Your fitness level, hiking experience, and even your location dictate which trails are available to you.
Since you're a beginner, you'll want to choose an easy route to ease yourself into hiking. You want to get a couple of quick and easy wins that will motivate you to continue hiking.
You need to be aware of the time you have and the length of the trail. Obviously, if you only have 2 hours, you're not going to choose a 30-mile hike. When it comes to distance, know that an average person walks at about 3 mph. If you do decide to go on a steeper trail, just keep in mind that for every 1,000 feet of elevation gain, you should add an hour to your hike.
My recommendation is to start with a hike that's at a 2 mile max – with minimal elevation. This hike should take less than 1 hour to complete, depending on your fitness level. It'll give you a great taste of the outdoors and nature, while not being too challenging.
After you've gone on a few hikes like this, you can then start to up the challenge, by going on steeper climbs, increasing the length of the hike, and so on.
Where To Find A Beginner-Friendly Hiking Route
You can find good routes in several ways:
- Talk to locals
- Ask your hiking buddy
- Trail databases such as All Trails
My favorite resource is the Hiking Project.
Here's an interactive map of hiking trails around the States and the world:
You can just enter your location and find the trail that's best suited to your level and needs.
Plan Your Route In Advance
One last piece of advice in this section: plan your trip in advance.
That means knowing when you're going to start the hike and when you're going to finish it. If you're unsure, you can take a look at AllTrails or other hiking websites – they usually have an estimated time for completion.
You also need to set the turnaround time. That means if the hike turns out to be more challenging than you anticipated, you need to have a set time by which you'll turn around (get it?) and go back the way you came.
A turnaround time ensures you have enough time to get back safely before the dark settles.
Let's get on to the next section, where you'll learn what to actually bring (and wear) with you on a hike.
Choosing The Right Hiking Gear
We've all seen weekend warriors who come to short hikes armed with 20-pound backpacks and enough gear to survive a month in the wilderness.
I'll let you in on a little secret: There's no need to look like you're preparing for the zombie apocalypse if you're going on a short hike in your neighborhood.
You do, however, need to be dressed appropriately and pack some outdoors essentials.
The Ten Essentials
These items are called the ten essentials because…well, they are essential if you're going hiking in the backcountry (and they are useful even on day hikes).
They are:
- Navigation
- Sun protection
- Insulation
- Illumination
- First-aid supplies
- Fire
- Repair kit and tools
- Nutrition
- Hydration
- Emergency shelter
We go into more detail about each and every one of these in our article here.
Don't Make These Mistakes When Choosing Hiking Clothes
If you want to be a happy hiker, there are a few rules you need to follow.
First, avoid clothes made out of cotton. Cotton gets damp and stays that way. Instead, choose clothes made out of wool and polyester – these are great for cooler temperatures.
Another rule is to dress like an onion – that means, in layers. Since the temperature can change rapidly, you want to have multiple layers you can take off or put on, given what's appropriate for that moment. If you live in areas where it rains a lot, you might want to consider packing a good backpacking rain poncho.
I suggest you wear long pants instead of shorts – that way you'll be able to protect your legs from scratches from the bushes on the road. The same goes for shirts – wear long-sleeved ones, and if it gets too hot, just roll up your sleeves.
Pick Comfortable Hiking Footwear
Choosing proper footwear is easily the most critical decision you have to make when it comes to picking the right hiking gear.
Now the main question most people ask themselves is this:
Should I get hiking boots or trail running shoes?
The answer to that question is: it depends.
Neither one is better or worse than the other, they are just meant for different things.
Hiking boots: They provide more support and are a lot more durable. They keep away the rain, snow, mud, and anything else you might encounter on the trail.
On the downside, they take a lot more time to break-in. They are also a lot heavier than trail running shoes, adding to your carrying weight.
Trail running shoes: They are obviously a lot lighter and more breathable. You also get a much better range of movement than you do with hiking boots.
On the downside, they usually don't last nearly as long as hiking boots do. They also lack ankle support that hiking boots provide.
So, with all that said, what should you buy?
If you're going on longer hikes, carrying a big backpack of 40+ pounds, go with hiking boots. Their support and durability are worthwhile for long-distance excursions. Hiking boots are also a necessity if you're going over rough, rocky, or snowy terrain. Just make sure they fit well and are broken in before your trip.
If you're mostly going on day hikes and don't carry a lot of weight, choose the trail running shoes. You'll be able to walk a lot faster without carrying the added weight of the boots. You also don't need boots if you're walking on well-maintained trails.
One last thing.
I want to point out that you shouldn't use a lack of hiking footwear as an excuse to stop you from going hiking.
Don't have proper hiking shoes or boots?
Not a problem.
Just choose a beginner trail that's on flat terrain. You can wear any old sneakers and still get to enjoy the outside.
Choose The Best Hiking Backpack And Other Gear
When it comes to choosing the best backpack to store all your gear, it all depends on the type of hike you're going on.
Are you going on a short day hike? Pack a smaller daypack, with a capacity of up to 20 liters.
Going on a longer, more strenuous hike? A backpack with a 30-40 liter capacity is a better choice.
Pack Enough Food And Water
A good rule to follow is – always pack more food and water than you think you'll need.
Generally, most people need around 1 liter of water for every two hours of hiking. This, of course, depends on your fitness levels and the trail, but it's a good rule of thumb.
When it comes to food, the ideal hiking food is:
- Lightweight
- Requires minimal preparation
- Calorie-dense
Ideally, you want to eliminate cooking. This not only means you would carry less weight, but you would also minimize the impact on the environment.
So what can you eat?
Most hikers focus on nutrition bars, energy gels, dried fruit and veggies, nuts and seeds, tuna, and other, similar foods.
Also See: How Many Calories Does Hiking Burn? (7 Factors That Come Into Play)
Preparing For The Hike
So you found your hiking buddy, you choose a good route, and you packed all your gear.
You're almost ready!
There are just a few more things to keep in mind before you set out on your adventure.
Let Someone Know Where You'll Be
Hiking is a lot of fun, but it can also be dangerous, especially if you're alone.
That's why you always want to inform a friend as to what you're itinerary is and when you expect to be back.
Doing this will exponentially increase your chances of being rescued if you get lost or hurt.
Start Your Hike Early As Possible
Are you an early riser?
Well, you're going to have to be one if you want to go on longer hikes.
The reason why you want to go early is that the weather is often fickle and unpredictable – no matter what the forecast says, it might change within hours. That means even if it's sunny in the morning, it might rain in the afternoon.
Another benefit of hiking in the morning is that it'll usually be far less crowded than later in the day. This will allow you to more fully immerse yourself in nature and enjoy your time outdoors without trampling on other people.
I suggest you wake up really early – 5 AM is a good time. That gives you enough time to drive to the park, finish your hike, and be back home by early afternoon. Not to mention that it's a lot cooler in the morning.
Get A Physical Map
I know, I know.
Physical maps seem so…antiquated… in our modern world.
After all, you have your phone with all of the modern apps and capabilities.
But consider this – you might:
- Lose or break your phone
- Wander outside the cell service area
- Run out of battery
Anyway, the point is that it's foolish to rely on just one piece of technology for your navigational needs.
That's why you should get a physical map. Maps never run out of battery or lose reception. If it's a topographic map, you can use it to get your bearings even if you don't have a compass.
Usually, you can get maps either at trailheads (the point at which a trail begins) or at a ranger station.
Check The Weather In Advance
I'll be honest: I've been guilty of ignoring this advice several times. And yes, I've been caught in bad weather more often than I'd like to admit.
That's why you should learn from my mistakes and always check the weather forecast before going on your hike.
In fact, you should do this several times. Once a few days before the hike, and then once the day of the hike.
Doing this will allow you to dress appropriately or even change your plans if the weather is not ideal for hiking.
Bring Cash
Wait, what?
You mean I actually need money to go hiking?
Well, maybe.
The truth is, every national park is different. Some of them charge entrance fees, some of them don't. The problem is that even if they have a website, it is likely not updated. That means you can never be sure if you're going to get charged or not.
Also, some of them have credit card scanners, but some of them don't.
The last thing you want is to drive 3 hours to that park, only to find out that the park's Visa machine doesn't work.
Think of cash as a backup – you might not need it, but you're sure as heck glad to have it.
As far as the fees go, they vary from park to park but shouldn't be too expensive. For example, Rocky Mountain National Park charges $25 for an all-day pass. Many parks organizations offer annual passes. However, even with a yearly pass, you may still be on the hook for a small entrance fee.
If you're lucky, you'll show up to the park on a "free day" where the entrance is comped for everyone. Unfortunately, these days aren't communicated that well. Your best bet is to bring cash, just in case.
Follow the time-tested Boy Scout's motto: be prepared.
A Few More Things To Keep In Mind
Before I finish this article, I wanted to talk about a few more things that you need to be aware of.
It's A Marathon, Not A Sprint
On every hiking trip, there's always that one person trying to be Usain Bolt. They start off with a light-speed sprint, only to slow down to a snail's pace after they tire from racing.
Don't be that person – when it comes to hiking, slow and steady wins the race.
I mean, you're there to enjoy nature, right? So where the heck are you rushing to?
Not only that, but you also might need your energy later if you get lost or if the hike turns out to be more difficult than you expected.
Keep a steady pace, enjoy the surroundings, and stay with your group.
Properly Train For Your Hike
Hiking is no walk in the park. It required physical strength and endurance.
Make sure that your fitness level is up par for the hike you have chosen.
See our top tips to train for your hike.
Know Your Hiking Etiquette
Lucky for us, hiking etiquette is much easier to remember than fancy dining rules. There aren't five spoons to choose from on the trail!
There are only a few things you need to keep in mind:
- Right of way. Just remember this order: Horses > Hikers > Mountain bikers. When it comes to other hikers, hikers uphill have the right of way. When hiking, rules of the road apply – stay to the right, pass on the left.
- Leave no trace. This is a set of principles used to minimize your impact on the environment. The best way to do this is to clean up after yourself and pack out anything you brought.
- Going to the bathroom. If you simply have to pee, just go and do your business at least 200 feet away from the water source. If it's #2, then you need to dig a small hole and cover it up when you're done. You should use big leaves for toilet paper and put them in the hole too – just make sure they're not poisonous!
- Meeting fellow hikers. Be polite and say "hello" to fellow hikers you meet on the trail. If you're hiking in more remote regions, you can have a quick chat about the conditions of the road ahead.
- Using tech on the trail. Mostly use common sense here. Don't listen to music on speakers – use headphones to listen to your favorite hiking tunes instead. Keep your voice down if you're talking on the phone. Don't block the road if you're trying to get that perfect picture.
There are many types of hiking
There are so many different types of hiking.
So its best to research the type of hike that will be best for you to get started, and as you become more advanced, you can take on bigger and more advanced challenges.
Hiking With Dogs Or Kids
Hiking in nature is one of life's great experiences. Naturally, you'd want to share it with your kids.
If this is your first time hiking with kids, it's best if you choose a short, flat hike that's less than 1 mile long. You get bonus points if the trail is close to your home.
You'll also want to make sure your kids have all the gear they need for their outdoor adventure. Make sure they have proper footwear and a good hiking backpack to carry their own gear.
You can get more tips by watching the video below:
When it comes to hiking with dogs, the first thing you need to do is find out whether dogs are allowed where you're going. Some places don't allow dogs at all, so it's imperative to check this before you leave your home.
If dogs are allowed, remember to keep it on a leash (it's a requirement almost everywhere). Be sure to regularly stop for water and treats and always, always pick up after your dog. These are just some basic rules, if you're dedicated to bringing your furry friend with you on every hike, you need to brush up on rules for hiking with a dog.
Use Your Phone Smartly
There are a few things you can do with your phone to make hiking safer and more fun.
First, put your phone on airplane mode – this saves precious battery life. When there's bad reception, the phone spends a lot of battery power trying to catch the signal. Turning airplane mode on means your battery will last a lot longer than you'd expect.
You'll also want to watch how far you've hiked via a hiking app of your choice. This is a great way to motivate yourself and keep track of the progress you've made so far.
Know-How To Deal With Wildlife
Nature is a cruel and unforgiving place, right? I mean, snakes and bears are around every corner waiting to get you…right?
Not really.
When it comes to rattlesnakes, they're mostly uninterested in you. If you leave them alone, they'll do the same.
Of course, it's up to you to be smart. Stay out of tall grass and keep on the trail. If you see a snake, give it a wide berth and walk around it. If, by some unfortunate circumstances, you do happen to be bitten by a snake, read up on the best way to treat a snake bite.
When it comes to bears, as long as you keep the food away, they should not bother you. If you're still afraid, be sure to pack bear spray. But don't make mountains out of molehills – thousands of people hike every day, and very few of them ever see a bear, let alone get attacked by one.
Conclusion
So there you have it.
Now you have enough information to go on your first hike.
Get a hiking buddy, choose an easy, beginner-friendly trail, pack smartly, and you'll be well on your way to becoming an experienced hiker in no time.
So what are you waiting for? Your next outdoor adventure awaits!
Want to learn more about hiking? Check out our list of interesting hiking facts!
Next up: Day Hiking Checklist