


Ever ventured into the frosty outdoors, thinking you're bundled up just right, only to feel the bitter cold seeping in? Shivering, teeth chattering, and wishing you'd prepared better? You're not alone—but there's an easy fix!
The secret? Layering.
Long before modern heating, people mastered the art of staying warm with just a few well-chosen layers. It's a skill as timeless as winter itself.
Today, I'm here to walk you through the magic of layering—breaking it down step by step so you can stay cozy, no matter how frigid it gets. I'll even share tips to make it simpler and more effective.
So grab a warm drink, and let's dive in!
How To Layer Clothes For Winter – A Layering Guide
In a nutshell, it all comes down to a layering system with three distinct sections – each with its own purpose.
The outermost layer is responsible for protecting you from wind, rain, snow, and other external elements. It's also sometimes referred to as the shell layer for apparent reasons.
Under that, you have the middle layer or mid layer, which is responsible for keeping all your body heat in. Due to its job, the mid layer is sometimes referred to as the insulating layer. Retaining your body heat is crucial to maintaining a safe core temperature level in cold climates.
Lastly, there's the base layer, sometimes called the underwear layer. Its main job is to absorb sweat from your skin.
I've seen some people only take one or two of the layers mentioned above rather than bringing all three along. Their logic is something along the lines of, "why would I bring extra layers that I won't use?!"
The thing is, you can't predict the weather with perfect accuracy. So, taking all three layers along is your safest bet. It's better to have them and not need them than to need them and not have them.
The Base Layer: Your First Line of Defense
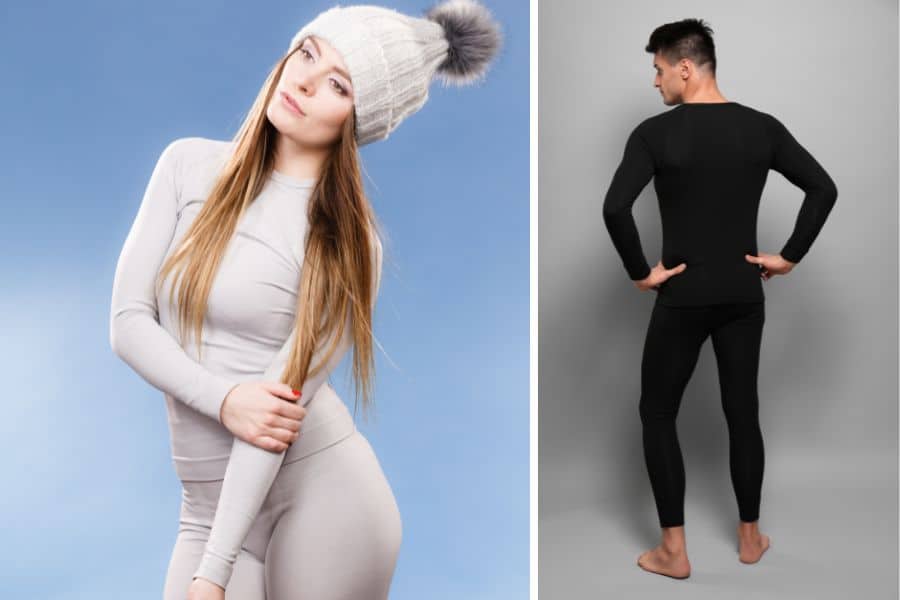
Let's start with the foundation of layering: the base layer. This layer is also commonly called "the underwear layer" and its primary function is to manage sweat by wicking moisture away and keeping you dry.
To do this effectively, you'll need the right material—one that's both breathable and absorbent.
Broadly speaking, you have two options: natural fibers or synthetic fabrics. Each has its pros and cons, so let's break them down.
Synthetic Base Layers
Synthetic fabrics like polyester and nylon are top choices for base layers because of their superior moisture-wicking abilities. Here's why they're so popular:
- Quick-drying: Synthetic fibers excel at pulling sweat away and drying quickly, keeping you dry and comfortable.
- Durable: These fabrics are tough and built to last, making them ideal for heavy use.
- Odor control: Some synthetic garments come with antibacterial treatments to minimize odors—a lifesaver for long adventures like thru-hiking.
While synthetics shine in performance, they can sometimes feel less soft against the skin compared to natural options, and they also may accumulate odors faster.
The main benefit of taking the synthetic route is the fact that you'll see the best performance in terms of drying, but it is also far more durable than natural materials. So if you anticipate heavy usage and want longevity in your wardrobe, then you might prefer synthetic over natural.
Shop Synthetic Base Layers on REI
Shop Synthetic Base Layers on Amazon
Natural Base Layers
Natural fibers like merino wool, silk, and cotton bring a different set of benefits to the table. Here's what you need to know:
- Odor resistance: Merino wool is naturally resistant to bacteria, keeping bad smells at bay even after days of use—without the need for chemical treatments.
- Comfort: Wool is soft, breathable, and great at regulating temperature. It retains some moisture, but this can actually help cool you down in warmer weather.
- Eco-friendly: For those who prioritize sustainability, natural fibers can be a more environmentally friendly choice.
However, natural materials like wool and silk aren't as durable as synthetics, and they're slower to dry.
Cotton, while affordable, isn't the best choice for active wear due to its tendency to hold onto moisture.
Shop Natural Base Layers on REI
Shop Natural Base Layers on Amazon
Synthetic vs. Natural
If you're dead set on natural, then try to find cloth with a sweat-wicking finish. It still won't perform at the same level as synthetics, but it can help bridge the gap.
If you can't decide, consider a blend of synthetic and natural fibers. This hybrid option combines the best of both worlds—moisture-wicking performance with added comfort and durability.
Ultimately, the right base layer depends on your activity and preferences. Are you braving freezing temps on a multi-day hike? Go synthetic. Looking for comfort and odor resistance on a lighter trek? Merino wool might be your new best friend.
The Mid Layer: Your Insulation Powerhouse

Now that your base layer is handling moisture, it's time to focus on the middle layer—the heart of your warmth trifecta.
This layer is all about insulation, keeping the heat your body generates close to you.
Mid-layers can include a wool sweater, cardigan, or jacket. Generally, the thicker the garment, the better the insulation. However, efficiency matters just as much as thickness, so it's essential to choose materials that trap heat effectively.
As with the base layer, you'll encounter a mix of natural and synthetic options, each with its strengths and weaknesses. Let's explore the most common choices for mid-layer insulation.
Polyester Fleece
Polyester fleece is a classic choice for a reason. It's breathable, warm, and performs well even when damp—making it ideal for rainy or damp conditions.
Fleece also dries quickly, so you won't be stuck shivering for long if it gets wet.
However, fleece has a tradeoff: wind vulnerability. Unless it's paired with a wind-resistant outer shell, strong breezes can rob you of warmth.
Fleece comes in three weights: 100, 200, and 300. The higher the number, the thicker and warmer the jacket will be. Choose the right weight based on your climate.
If you're worried about the wind, consider a wind fleece, which offers added wind resistance while maintaining the comfort and warmth of regular fleece.
Strengths
- Highly Breathable
- Warm even when damp
- Dries quickly
- Lightweight and rain-friendly
Weaknesses
- Vulnerable to wind without an outer shell
Down Insulated Jackets
Down jackets are the champions of warmth-to-weight ratio, making them an excellent choice for cold conditions. Their insulating power comes from natural down feathers, which trap heat effectively.
These jackets are also incredibly compressible, making them easy to pack away when not in use. Additionally, the outer shell of most down jackets offers some wind resistance, adding to their utility.
However, down has a significant drawback: it loses its insulating power when wet. Unless you're in dry conditions or layering with a waterproof shell, a down jacket may not be the best choice.
Strengths
- Unparalleled warmth-to-weight ratio
- Compressible and easy to store
- Wind-resistant outer shell
Weaknesses
- Poor performance in wet conditions
- Typically more expensive
Synthetic Insulated Jackets
Synthetic insulated jackets aim to mimic the warmth of down while offering better performance in wet conditions. While they don't quite match the insulating power of down, they're still warm, more affordable, and retain their insulation even when damp.
These jackets also come with an outer shell that provides wind and water resistance, making them a versatile choice for unpredictable weather. The downside? Synthetics aren't as compressible as down, so they take up more space in your pack.
Strengths
- Insulates well, even when damp
- Wind and water resistance due to the outer shell
- More budget-friendly than down
Weaknesses
- Bulkier and harder to store
- Slightly less effective at insulation compared to down
Shop Synthetic Down Jackets at REI
Shop Synthetic Down Jackets at Amazon
Shell/Outer Layer

Finally, the outer layer. This layer of clothing tends to take the most wear and tear since it's exposed to all the elements.
In addition to precipitation, shell layers should also protect you against sharp branches and jagged rocks. You'll be attacked by all kinds of nature while exploring, and you want your shell to hold up well.
There are multiple categories of shells that you can choose from, and now I'll go over each one:
Waterproof + Breathable
These are the crème de la crème of outer layers. If you're looking for top-shelf functionality, then this is the category for you.
Of course, high-end performance comes with a premium price tag, so these shells won't be suitable for everyone's budget.
Waterproof and breathable shells will not only resist all water, but they'll also keep you nice and fresh.
While you might spend a significant chunk of change on these shells, you'll find that the dryness and durability are well worth it in the end.
Best for: outdoors professionals who want the best performance.
Shop Waterproof Shells on Amazon
Water-Resistant + Breathable
If you're only anticipating light rainfall, then you don't really need to spend much on waterproof shells. Water-resistant options should be more than enough, without breaking the bank. This kind is often made out of polyester or woven nylon, making them reliable against rain and wind.
This is a popular choice among beginner campers since they offer durable rain protection without costing an arm and a leg.
Best for: intermediate hikers who want robust water protection without investing a ton of money.
Shop Water-Resistant Jackets on Amazon
Shop Water-Resistant Jackets at REI
Soft Shells
These types of shells prioritize breathability above all else. You'll find that most incorporate fabric panels to make aerobic activities more comfortable. These shells have minor protection from wind and rain, and also feature light insulation.
These are ideal if you're gonna be camping under calm conditions but want a shell just in case good weather takes a slight detour.
Best for: moderate weather campers who want some insurance against cold weather.
Waterproof + Non-Breathable
Also known as a bare-bones rain jacket, this is the most affordable outer layer around. These are useful all-purpose shells that can be used for any activity.
This category is pretty stripped down, but can still be useful in certain situations. They're ideal for rainy days when physical activity will be kept to a minimum. This could include hobbies like bird-watching, fishing, and the like.
They aren't suited to hiking or other high-exertion tasks since, due to the coated nylon construction, they don't breathe from the inside. This means you'll find yourself swimming in a pool of sweat in no time.
I recommend these to be carried in your bag in case of rain. If you plan on wearing it throughout your excursion, you should probably use one of the more premium options above.
Best for: regular outdoorsmen who want insurance against rain.
Waterproof Pants
So far we've mostly talked about layering shirts, fleece, and jackets. But lets not forget pants!
A great pair of snow pants will keep you warm with simply the pants layer and the base layer.
Of course you can wear your long underwear with jeans or other more casual pants, but if you are going for a snow play day, a snow hike, skiing, or more time outdoors, you'll want waterproof ski/snow pants.
These pants will typically have a waterproof and windproof fabric that forces moisture to bead up on the surface rather than penetrating it. They'll usually come with adjustable waist tabs and belt loops, zipper pockets, and sometimes venting.
Shop Waterproof Pants on Amazon
Cold Weather Accessories Necessities

No matter what the weather, you should never, ever, ever, leave home in cold weather without proper hand, foot, and head protection.
For this you'll need a great hat to keep you warm, gloves that can withstand not only the temperature, but other harsh weather conditions if you'll run into them like rain and snow, and of course excellent socks!
Hats & Beanies
Your body heat can also escape through extremities, which is why it's essential to wear a warm hat when you camp in cold temperatures.
The classic beanie of course works best. Now a days, you can find a beanie in whatever color, pattern, or design you can imagine.
Balaclava Caps, trapper hats, and other winter caps can give you some style if you are looking for it too.
Just make sure that you have a hat that keeps you warm. You'll find you especially want to wear it while winter camping to keep you safe and warm.
Gloves & Mittens
Once you've found your warm hat, now you need a pair of warm gloves. This pair of gloves should have a tight fit so that you can accomplish critical tasks (like tying knots) without taking them off.
You don't want to have to take your gloves off and expose your hands to freezing temperatures just to get something done. So, pick a pair that'll give you dexterity without sacrificing warmth.
There are various types of gloves, those with insulated layers for super cold conditions. Depending on the conditions, you will also need heavier waterproof gloves to ensure that your fingers are left soggy and cold.
Socks
If your feet aren't warm, then you are destined to be cold, no matter what.
Keeping your feet warm is key, and that is why you want to have a good pair of winter socks.
Wool socks or thick synthetic insulated heavyweight socks are a must, and you'll want to make sure that you have a backup especially if you are planning on encountering inclement weather.
Boots
While we're talking about extremities, make sure you have the right footwear for the job. Boots come in various levels of insulation, and you'll want to bring a pair that matches your climate.
Ultimately, what matters most in the winter, is waterproof boots. Expect bad weather. Expect snow and water. Bring boots that are up to task, especially if you are expecting snow.
Tips & Tricks: Layering and Cold-Weather Camping
Alright, at this point, you know what kind of layers are out there. Now, it's time to go over how to properly layer.
Swapping
There's no one-size-fits-all solution when it comes to layering. You'll often find yourself switching between multiple garments throughout different trips.
For successful swapping, bring enough layers to cover your worst-case scenarios. Then, add or remove based on what situations you find yourself in.
At a bare minimum, I advise that you should always bring at least one waterproof shell in case of an emergency.
Planning
As you've already seen above, there are tradeoffs between every kind of layer you can bring. This is why it's so crucial to know the environment you'll be camping in before selecting which garments to take along.
For instance, if you're camping in a wet area, then nylon is your best bet. On the other hand, down jackets are more suitable for freezing campsites. It comes down to planning ahead and being prepared for unexpected occurrences.
Budgeting and Bartering
As with any camping equipment, you should ensure that you don't break the bank when picking garments for layering. If you're trying to minimize expenses, then try buying second-hand shells and jackets at thrift shops or even online.
If you have camping buddies, then you can offer to trade some spare equipment in exchange for their layers. Bartering is a frugal way for a group of campers to unload old stuff and get the gear that they actually need.
Sleeping Surfaces
Where you sleep also plays a significant role in staying warm. If you're gonna be camping in a snowy area, then there are a few things you should do before lying down.
Start by finding a flat surface. Next, you'll want to clear away all the snow until you see exposed dirt. Immediately use your knees to flatten the ground beneath your tent or sleeping bag. If snow melts from your body heat then re-freezes, it will be tough to flatten, so time matters.
Also, remember that your sleeping bag is technically a layer. Factor in the temperature rating of your sleeping bag when considering what clothes to bring.
Conclusion
As you can see, there are infinite materials to choose from with every layer. Which one is right for you comes down to your camping environment, budget, activities, and personal preferences.
We hope that the material overviews and tips covered in this winter layering guide help you make the right choice and experience the joys of camping year-round.
That's all for now and happy hiking!
More on Cold Weather:
1 thought on "Winter Layering Guide: How to Layer for Cold Weather"
Really great information. Going to Lake Tahoe for vacation next month. 3/2026. I feel much more confident now about what to choose for my clothing.