

Hiking is an extremely fun outdoor activity, but it’s not without risks. Sudden knee pain can make finishing the trail rather difficult, and in extreme cases, practically impossible without help.
Knee pain often occurs when hiking downhill. But don’t be frightened – it can also be easily avoided. You just need to know how.
In this article, I’ll share with you everything you need to know, from the causes of knee pain to what you can do to avoid it. Let’s start!
Why Do My Knees Hurt After Hiking?
The reason your knees hurt after hiking is that they’re put under a tremendous amount of stress, especially when going downhill.
As you go down the slope one leg at a time, each knee is forced to absorb the impact of both your own weight and the force of gravity.
What’s more, your legs and ankles are often at weird angles when going downhill, which further puts stress on your joints.
And let’s not forget your backpack. When you’re hiking, you need your necessities close at hand. But a heavy pack will not only weigh you down but put even more pressure on your knee caps.
What Causes Pain After Hiking?
As you can see, your joints are under a lot of pressure when hiking. But there can be many reasons why you experience pain during this activity.
Obviously, the first step towards dealing with pain is getting a diagnosis from your doctor.
In this section, I’ll mention some of the most common conditions that are related to knee pain.
Different Causes Of Knee Pain:
ACL Damage
Anterior cruciate ligament (ACL) injury is one of the most common knee conditions a hiker can experience. It can occur with sudden stops or changes in direction, jumping and landing. Its symptoms include rapid swelling, pain, loss of range of motion and instability when putting pressure on the knee.
Minor ACL sprains can go away with regenerative medicine therapy, but in the case of a full ACL tear, surgery is inevitable.
Bursitis
If the pain is situated on the inner side of your knee below the joint, and it feels warm and swollen, you’re probably dealing with bursitis.
This condition occurs when the bursa (a fluid-filled sac that reduces friction between body tissues) gets inflamed.
Patellar Tendonitis
Also known as “jumper’s knee”, this condition is characterized by a sharp pain above or below your kneecap. Patellar tendonitis is caused by repetitive stress on your knee. It’s a sports injury, and the best way to deal with it is to let the knee rest and heal.
Tendinosis
Unlike the previous two conditions, this one isn’t caused by inflammation. Instead, it’s a chronic condition that results from a tendon repeatedly suffering smaller injuries that aren’t healed correctly. It’s more common in older hikers, as their joints become less flexible as they get older.
Tendinosis can be cured, but that can take up to half a year. Physical therapy, along with medication, can help speed up that process a bit.
Torn Meniscus
This condition usually occurs when you put pressure on a twisted knee. Your knee has two pieces of cartilage. They cushion your shinbone and thighbone and protect them from wear and tear.
You might feel a ‘pop’ if you tear your meniscus, accompanied by sharp pain, stiffness and swelling. Depending on the injury, your knee might heal on its own. But in most cases, medication and physical therapy are required.
Synovial Plica Syndrome
This condition is also a result of stressing and overusing your knees. Unlike most other knee-related conditions, this one is followed by a continuous or prolonged dull pain. Usually, this syndrome will resolve with rest and anti-inflammatory medicine.
Iliotibial Band Syndrome
The iliotibial band is a band of connective tissue between your muscles and knees. Like most conditions, this syndrome occurs with overuse of the joints and is accompanied by pain and inflammation. In most cases, treatment includes resting and medication. Surgery is rarely required.
Osteoarthritis
It is a degenerative type of arthritis that occurs most often in older individuals, although younger people can suffer from it, too. It usually develops slowly, but the pain worsens over time. While there’s no cure for it, medication and physical therapy can help relieve the pain.
Is Hiking Downhill Bad For Your Knees?
That was quite a list of injuries that can be caused by hiking downhill. Still, that doesn’t mean that this activity is necessarily bad for your knees, as long as you know how to take care of your joints.
Our body is mostly made up of fascia, a band of connective tissue that surrounds muscles and separates them from other organs. It’s like an elastic web that absorbs impact during strenuous physical activities.
The best way to picture it is to think of fascia as a sponge. When healthy, it absorbs water and expels the excess without a problem. But with use, it becomes brittle, stiff and doesn’t absorb as well as it used to.
How To Avoid Knee Injuries While Hiking?
Knee injuries happen. But you can avoid unnecessary damage by doing these things:
1. Go Slow
Rome wasn’t built in a day. Don’t force yourself, as that’s the number one reason for injuries. Go at your own pace and slowly increase your speed when you feel comfortable doing so, especially when hiking downhill.
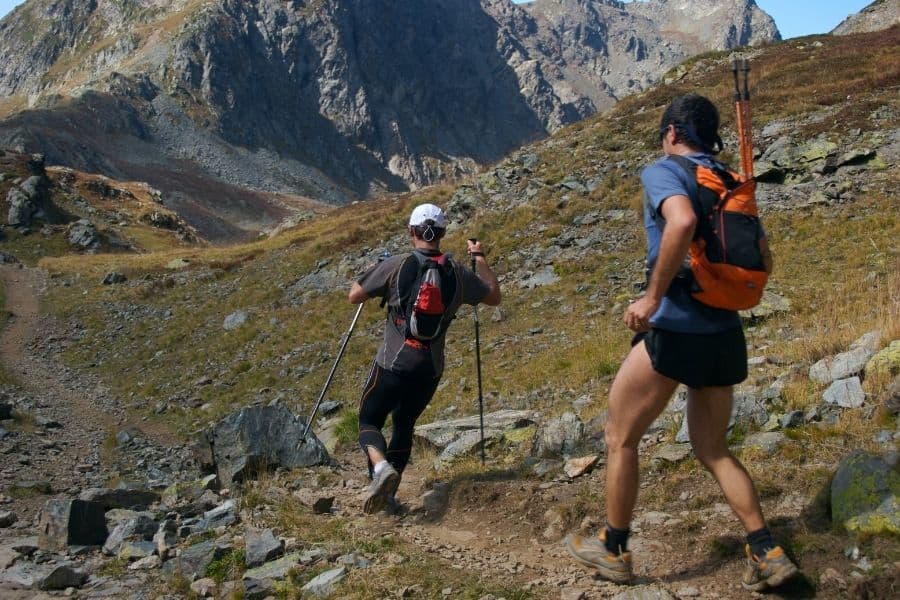
2. Use Trekking Poles
Poles aren’t just for old people. They help with distributing your body weight evenly on all of your extremities, thus relieving your knee joints of too much pressure. Trekking poles can reduce the vertical forces on your knees by 12-16%.
3. Use Shorter Strides
When you shorten your strides even by a small amount, you’ll reduce the amount of stress on your knees quite significantly.
4. Reduce your overall body weight
No one hates to be told that you might want to lose weight, but “research has proven that a sustained 10- to 15-pound weight loss in obese young people can translate to a much lower risk of osteoarthritis later in life.” But let’s face it. Less weight, means less stress on your knees. So if you love hiking or camping when you’re overweight, you should seriously consider trimming some pounds.
5. Strengthen Your Leg Muscles Beforehand
The stronger your leg muscles are, the more weight and pressure your knees can withstand and absorb. To strengthen them, you should work out with a focus on strength and flexibility.
6. Wear High-Quality Hiking Boots Or Shoes
Proper footwear is your most important piece of equipment. Your shoes or boots need to fit like a glove, offer ankle support and feature shock-absorbing soles.
7. Stretch Before Hiking
Stretching before a strenuous physical activity allows the muscles to loosen up and become resistant to the impact.
8. Wear A Knee Brace
This is a must if you’re recovering from an injury, but can also be used without a prior condition. A knee brace is a great way to give your joints additional stability while on a challenging hiking trail.
The Most Effective Training Techniques For Hiking Downhill
As we already established, maintaining a proper fitness level is the best way to avoid unnecessary knee injuries. Now, you might be wondering – how to achieve that? Here are some of the best hiking training techniques that can help you gain the required strength and endurance.
1. Walking Downstairs
Going up and down the stairs is rather similar to the movement you’re doing when going up and downhill. You can do this practically anywhere – inside the building, out in the park etc.
2. Resistance Training With Slow Contractions
Some of the best exercises include walking and reverse lunges. But to properly train for hiking downhill, you need to also include slow contractions. For instance, when you’re doing a walking lunge, make sure your back leg knee goes towards the floor for at least a few seconds.
3. Plyometric Training

Plyometric training is a type of exercise that uses the speed and force of movements to increase muscle power. These include box jumps and burpees. But keep in mind that these power training exercises require you to already have a strong lower body, so you should do resistance training for a few months before starting plyometrics.
4. Isometric Leg Training
This type of training requires you to freeze in a challenging position when doing an exercise. Wall sits and planks are good examples. These exercises help you strengthen your leg muscles and improve your range of motion.
5. Balance Training
The best way to lower your chance of stumbling on a trail is to practice your balance. This type of training requires you to do exercises that strengthen the muscles that help keep you upright.
Best Equipment To Help Mitigate Knee Pain When Hiking
Aside from having a good fitness level, you also need proper equipment that will protect you from knee pain while on the trail.
1. Hiking Boots
Your footwear is the most important piece of your hiking equipment. They need to have good traction, and be sturdy yet flexible enough to allow you a wide range of motion. They also need to be comfortable, a good fit, and broken in.
2. Trekking Poles
As I’ve already stated, trekking poles aren’t reserved for the elderly. They lessen the forces on your lower body extremities by redistributing some of the load to your arms and shoulder. Trekking poles also help you keep balance on uneven and harsh terrain.
3. Knee Brace
There are different types of knee braces, including pull-up sleeves, knee straps, neoprene, and magnetic braces. They each are most suitable for specific situations, so pick the one that suits your physical conditions.
There are a few things to pay attention to. If your knee is swelling, for instance, use an adjustable knee support that can’t stop your circulation once the swelling increases. During hot weather, you might want to use a knee brace with less skin covering, so that you don’t sweat as much.
4. Kinesio Tape
This type of tape is used to stabilize the injured area by applying light pressure to the tissue it’s wrapped around. It doesn’t restrict your movement – it puts just enough pressure and support to facilitate strength in your muscles. That way, the tape allows the connective tissue surrounding the affected muscle or tendon to move along with the body.
5. Weighted Vests
Weighted vests are a great tool for building strength. You can find these vests weighing from 12 to 150 pounds. When choosing, keep in mind that a weighted vest should not weigh more than 10 percent of your body weight.
What’s more, you should know that if you’re already experiencing knee or back pain, wearing a weighted vest for additional resistance may worsen your current condition. In that case, it’s best to deal with the injury first, then start wearing a weighted vest once it’s healed.
6. Extra Packed Weight
If you don’t have a weight vest, no worries – you can wear a heavy backpack instead.
After all, you’ll wear the same thing on a hike.
If you train your ankles, knees, hips, and back to tolerate a heavy pack, then you’ll have an easier time controlling your body weight and movement while hiking.
7. Physical Therapy
In most cases, knee pain can be mitigated with proper physical therapy.
But, it has to be prescribed by a physical therapist. That’s not something you can or should come up with a routine on your own if you’re not an expert in the field.
In Conclusion
As you can see, prevention is the best cure when it comes to avoiding knee pain while hiking.
Whether you’ll be hiking in the snow or simply trying to get back out there, there are plenty of things you can do, from exercises to improve your endurance and strength, to upgrading your equipment so that you’ll have better balance and support.
No matter what, it’s best to be prepared, and have a plan because hiking injuries can and will happen.