


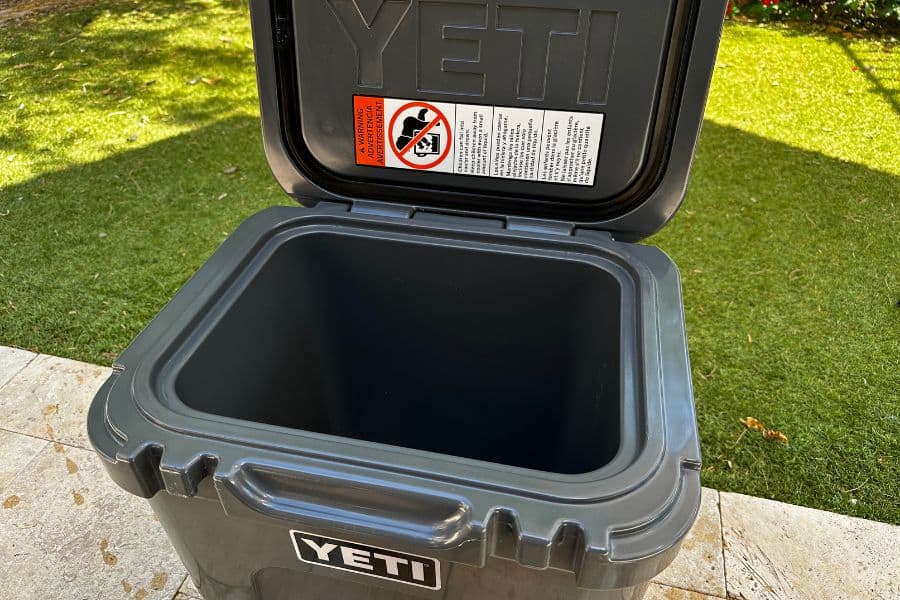
YETI coolers are a stalwart on all my car camping adventures and day trips – and it shows.
Depending on what I'm using them for, the inside and outside of my coolers can get stained from food and dirt.
Because of this, it's important to give your camping cooler a good thorough cleaning after each use, so that it can stay sanitary and ready for your next excursion.
In this article, we'll discuss the best way to deep clean your camping cooler.
How to Clean a Camping Cooler: Step-by-Step Guide
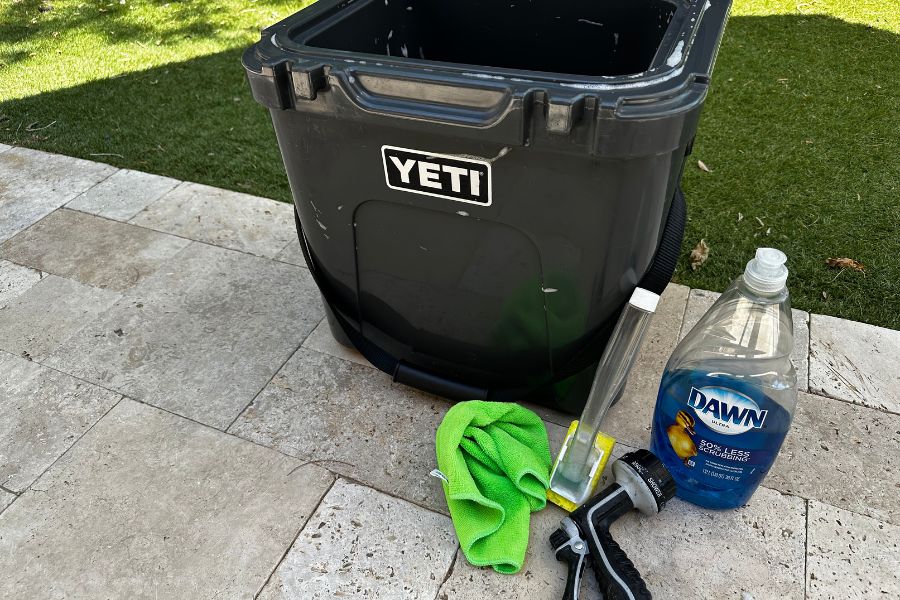
Step 1: Gather Cleaning Supplies
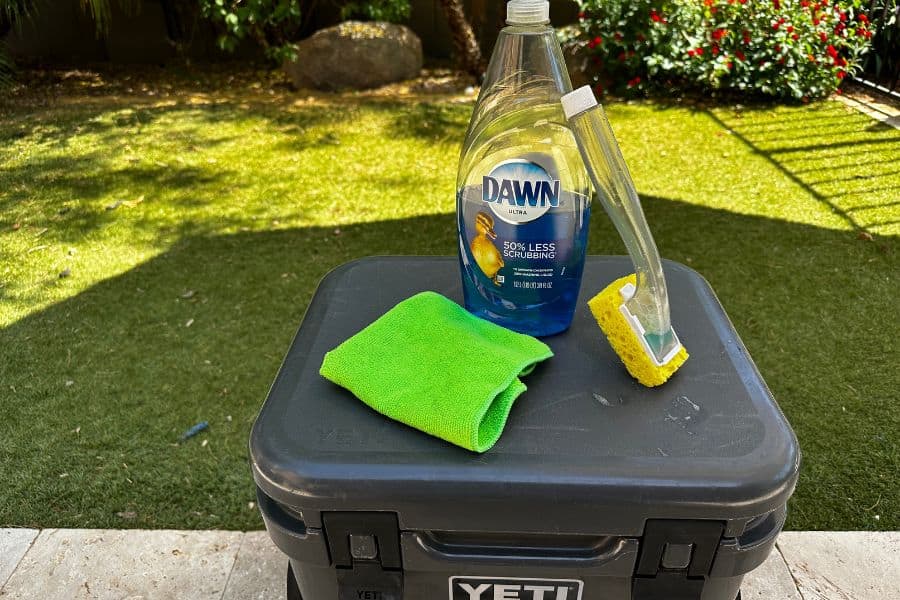
When you're cleaning your cooler, you'll want to get rid of three main things: dirt, smell, and stains.
To tackle these different offenders, we'll need different types of cleaning materials:
- Mild dish soap
- A soft scrub brush or sponge
- A microfiber cloth
- Baking soda and water mixture
- Vinegar
Basic cleaning supplies, like mild dish soap and a soft scrub or sponge, will help you get rid of any dirt or mold that has accumulated in your cooler.
Next, you'll have to step it up to "deodorize," or get rid of any lingering smells in your cooler. For this, you'll need baking soda and water.
Finally, you can use white vinegar to tackle any additional stains left on the cooler.
Step 2: Empty the Cooler
Once you're back home from your adventure, make sure you empty out all of the food and drinks from your cooler.
Leaving food in your cooler over a long period of time can lead to mold growth, which can make cleaning your cooler even more difficult.
Additionally, leaving food in a cooler can attract bugs and other vermin. Trust me, if you forget about your full cooler in the garage, the bugs will find it before you will!
Step 3: Give Your Cooler an Initial Rinse
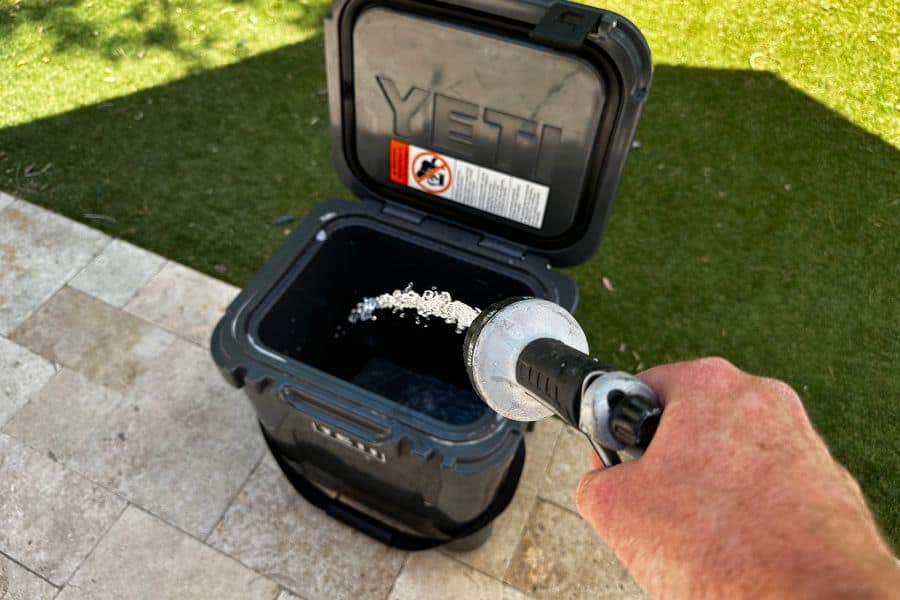
Once all the food is removed from the cooler, give the cooler an initial rinse-out with water.
It's important to get large food particles or errant liquids out of the way before you start the cleaning process.
Depending on how dirty your cooler is, you can either complete this step in your kitchen sink, or outside with a garden hose.
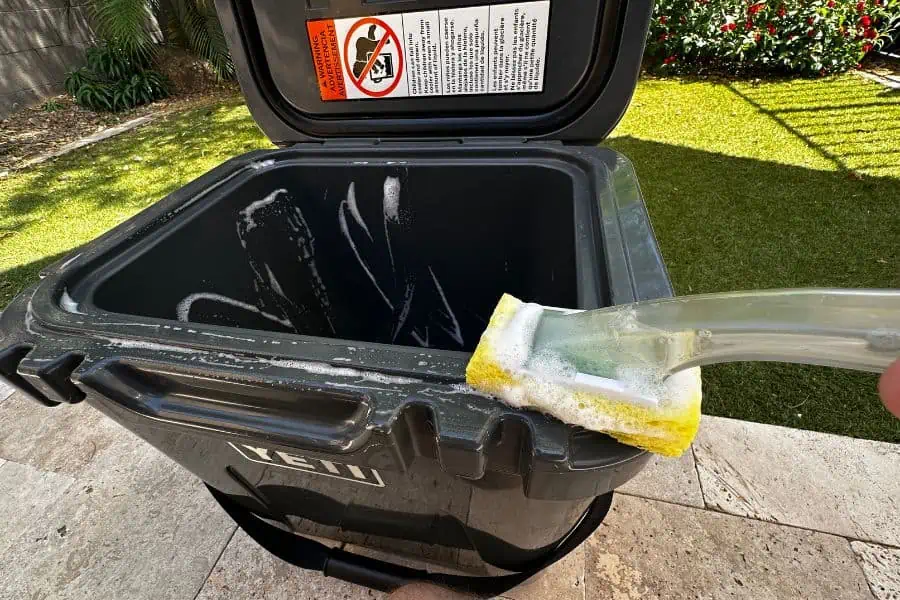
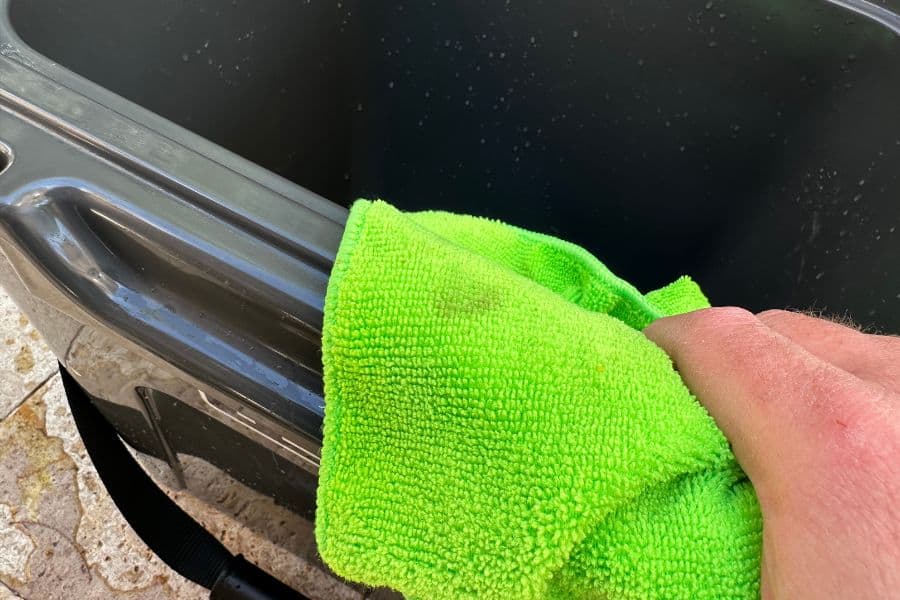
Step 4: Complete a Basic Cleaning
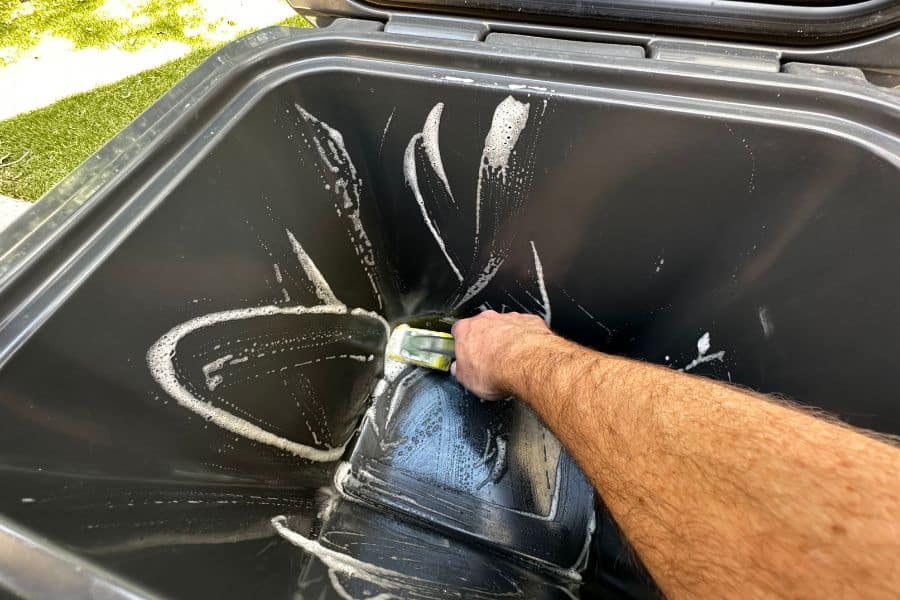
Time to get cleaning! Apply water and dish soap to your cooler and start scrubbing with your sponge or scrub brush.
Coolers can have a surprising amount of nooks and crannies, so make sure that you get in all the corners to complete this initial clean.
For scrubbing, I think it's best to use a scrubbing instrument, like a sponge or scrubbing brush. Once you've scrubbed thoroughly with soap, rinse out the cooler.
If you see additional stains or dirty spots at this stage, you can go back in with a magic eraser on both the interior and exterior of the cooler.
However, if those stains are especially stubborn, we'll address them with vinegar in Step Five.
Step 5: Deodorize the Cooler
Once the cooler is clean, it's time to get rid of any lingering smells. This is where the baking soda comes in.
Combine baking soda with water and apply the resulting paste to the interior sides of the cooler.
You can let this mixture sit anywhere from 1-3 days before scrubbing, rinsing out, and continuing with your cleaning process.
Please note: Deodorizing only needs to be completed during "deep cleans" of your cooler. If there are no bad smells coming from your cooler, you can skip this step!
Step 6: Tackle any Additional Stains
If you have any stubborn stains remaining on your cooler, vinegar will be your best friend.
Combine one part vinegar with one part water and use a rag to apply to the tricky stain.
If you're still seeing stains after treating them with vinegar, you can try again with lemon juice replacing the vinegar in the mixture described above.
If the stain is still giving you trouble after both vinegar and lemon treatments, you can try using bleach sparingly on the stain.
However, if you use bleach, it's important to thoroughly rinse out the cooler to avoid any bleach residue coming into contact with food products during your next camping trip.
Step 7: Storing the Cooler
Always let your cooler air dry with the lid open.
This will allow the cooler to dry completely and prevent any mold growth from residual water left over.
Once your cooler is completely dry, seal it and store it in a cool, dry environment.
Tips for Cleaning Your Camping Cooler
Ensure Proper Protection During Cleaning
As important as a clean cooler is, it's even more important that you keep yourself safe when you're cleaning it out.
In general, the substances we're suggesting you use for cleaning (dish soap, baking soda, vinegar) are fairly safe for everyday use.
Bleach will require different protection measures, but we'll get there in a moment!
In general, none of the cleaning materials we recommend should be ingested while being used for cleaning.
Additionally, baking soda and vinegar can be harsh on sensitive skin and irritating to the eyes.
When you're cleaning and "deodorizing" your cooler, make sure you're keeping your cleaning supplies away from your eyes and mouth and refrain from touching the substances directly.
While you won't necessarily need any heavy-duty eye or face protection for these substances, it can be helpful for those with sensitive skin to use cleaning gloves.
However, if you attack a particularly stubborn stain with bleach, you will need to use cleaning gloves to protect your hands and forearms.
Too much exposure to bleach can result in an uncomfortable chemical burn.
You will also want to ensure you use bleach in an open space so that you do not breathe in too many of its fumes.
Selecting Appropriate Cleaning Supplies
Dish soap, baking soda, and white vinegar are great ingredients for cleaning because they are staples in any household and readily available at any supermarket.
However, it's important to use white vinegar over other types of vinegar because it's more effective.
It's best to use brand-new scrubbing materials for this task.
Depending on how dirty your cooler is, you can even keep a dedicated "cooler cleaning" sponge, scrub brush, or magic eraser handy for the next time you need it.
Following a Systemic Cleaning Approach
Making sure you're following a routine when cleaning your cooler is a great way to ensure that it's as clean as possible and you're not forgetting any parts of the process, or sacrificing the cleanliness of your gear.
Lucky for you, we've detailed the best process above in six easy steps!
Focusing on Tricky Parts of the Cooler
There are a ton of nooks and crannies in any cooler, so make sure you're getting all the corners and small spaces when cleaning.
This can mean using the smallest corner of your sponge or using paper towels to clean the especially small spaces.
Cooler Storage and Maintenance
After you've cleaned and dried your cooler completely, seal it and store it in a cool, dry environment.
Finding a dry environment will decrease any risk of mold growing on the cooler when it's not being used.
Additionally, storing your cooler in a hot environment can damage its materials and shorten its overall use time.
When you're ready to use your cooler again, take it out of storage and rinse or wipe it out before filling it up for your adventure!
Eco-friendly Cleaning
Especially if you're cleaning your cooler outside, it's important to use environmentally friendly, biodegradable, or non-toxic cleaning materials.
There are a lot of options for environmentally friendly soap, including Dawn dish soap and Campsuds.
Baking soda and white vinegar are both biodegradable and non-toxic, so you can use both for cleaning outside in moderation with no worries.
Additionally, it's important that you're aware of any wildlife threats in your surrounding area if you're cleaning out substantial food particles outdoors.
Make sure you're not in an area with dangerous wildlife or bears that might be attracted to the food particles left behind.
Regular Cleaning Schedule
Lastly, it's best to clean out your cooler every time you come back from a trip, and deep clean (i.e., deodorize, stain removal) your cooler every three to six months.
Making sure that your cooler is cleaned regularly and stored appropriately will ensure that you can use your cooler for years to come!
Tips for Cleaning an Electric Camping Cooler

Electric coolers require a different cleaning process than their regular, non-electric counterparts because they have more complicated electric infrastructures.
Because of this, it's important to avoid using large quantities of water or cleaning supplies.
Instead, use ONLY a damp cloth to clean out electric coolers.
This technique will help you avoid the risk of electrocution.
If you have any specific questions about cleaning or deodorizing an electric cooler, I recommend looking up your specific model's manual online.
Most manufacturers have specific cleaning guidelines included on their sites.
FAQs
How often should I clean my camping cooler?
It's best to clean your camping cooler with soap and water after each use.
However, it is not necessary to deodorize your cooler each time you use it – only when there are smells you want to get rid of!
What kind of cleaning solution should I use to clean my cooler?
You can use regular dish soap for the initial cleaning, baking soda for the deodorizing process, and white vinegar or lemon juice for stain removal.
Bleach can also be used to clean your cooler, but should be reserved for only occasional stain removal.
If you're washing your cooler outside, make sure you use environmentally-friendly soap, like Dawn dish soap or Campsuds.
I completed all six steps, but there are still stains on my cooler. What do I do?
You did the initial cleaning and deodorizing process, but you're still seeing stains? Never fear!
If you're still seeing stubborn stains after you rinse off your white vinegar mixture, you can try using lemon juice in place of vinegar in the mixture above.
Still, seeing a stain? If the other methods haven't helped, you can use bleach sparingly on the stain and rinse thoroughly.
I don't recommend using bleach as your first option, because leftover bleach residue can be dangerous near food products.
Can I use a pressure washer to clean my camping cooler?
While you technically can use a pressure washer to wash the exterior of an especially sturdy camping cooler, I do not recommend using a pressure washer for most coolers.
Unless your cooler is heavy-duty, it's highly likely a pressure washer will damage its surface and shorten its overall use time.
How do I clean the exterior of my camping cooler, especially if it has fabric material?
For the most part, fabric coolers can be cleaned using the same process as coolers with hard exteriors.
However, some fabric coolers are machine washable and can be thrown in the washing machine following label instructions.
Even if you use a washing machine, it's best to let the cooler air dry in a warm, dry environment.
In Summary
Keeping your camping cooler clean is an important step in keeping everyone safe and healthy on your camping and day trips.
And, ensuring that you use the steps above to complete thorough cleanings of your cooler will help you keep your cooler in tip-top shape for years to come.
More on Cleaning Camping Gear
1 thought on "How to Clean a Camping Cooler: Get Rid of Smells, Gunk & Mold!"
Great guide on how to clean a cooler! Your step-by-step instructions make the process easy and ensure a fresh and odor-free cooler for the next adventure. A clean cooler is a happy cooler. Thanks for the helpful tips!