


We've all seen it in the movies…and, I'm sure most of us tried to do it at some point when we were kids.
I'm also pretty sure none of us succeeded.
Yes, I'm talking about rubbing two sticks together to start a fire.
It's not quite as straightforward as some of the movie depictions would have us believe. But it can be done.
There are a few ways you can do it, and today i'm going to show you how to start a fire with sticks in three different ways, so you can try it out for yourself.
By the time you're done reading, you'll have all the knowledge and skills you need to light a campfire, no matter where you are.
Hand Drill Method
The first method we're going to go over is the hand drill method.
You'll need to gather:
- A fireboard
- A spindle (the stick)
- Firewood
When it comes to firewood, you'll need three kinds: tinder, kindling, and larger pieces of wood.
Tinder is a bunch of small sticks, dry grass, and other dry vegetation. It ignites easily, but burns quickly. It's best used to get your fire going.
Kindling is medium-sized sticks, twigs, and pieces of wood. Your tinder lights your kindling, and your kindling lights your larger pieces of firewood.
The larger pieces will burn slower, keeping your campfire alive and burning for some time.
Make sure that the wood you're using is as dry as possible, otherwise it won't burn well.
If you're not familiar with a fireboard, it is a flat, dry piece of wood that's about a half-inch to an inch thick.
You may need to split the wood with your hatchet to get it down to the right size.
Now, let's get into the steps for using the hand drill method.
Step 1: Prepare Your Fireboard & Spindle
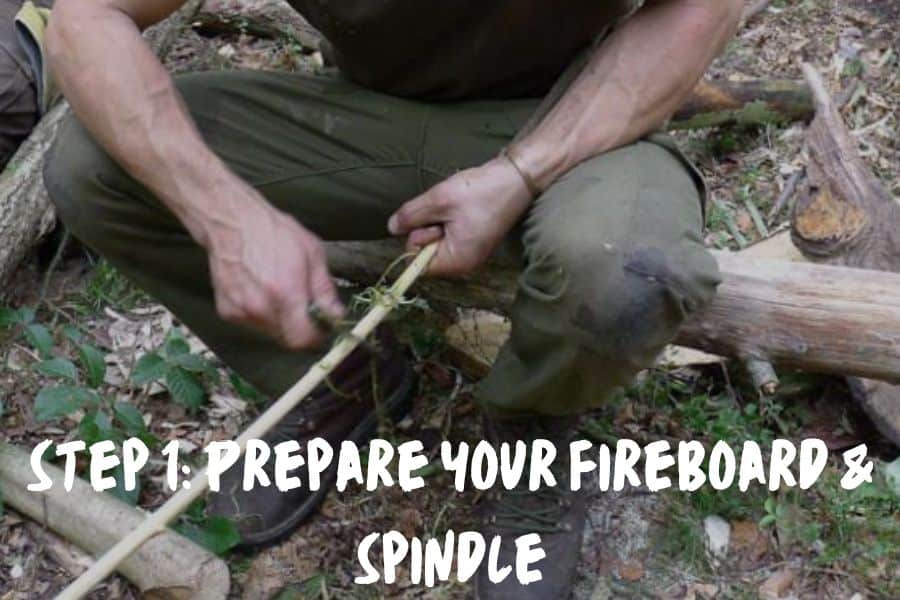
Make sure that your fireboard is stable when you lay it on the ground. If it wobbles, you'll have a hard time drilling your spindle into it.
Before you get started, the first thing you need to do is cut a small triangle – or V shape – out of the side of your fireboard.
Next, drill a small, shallow hole where the point of the letter V is. This is where the tip of your spindle will rest while you're drilling.
Your spindle should be a long, straight stick with a pointy end.
Make sure you pick a stick that's made of sturdy wood so that it doesn't break while you're drilling.
You can use a pocket knife to sharpen the end of the spindle and cut off any uneven bits so that it's as straight as possible.
Step 2: Assume The Position
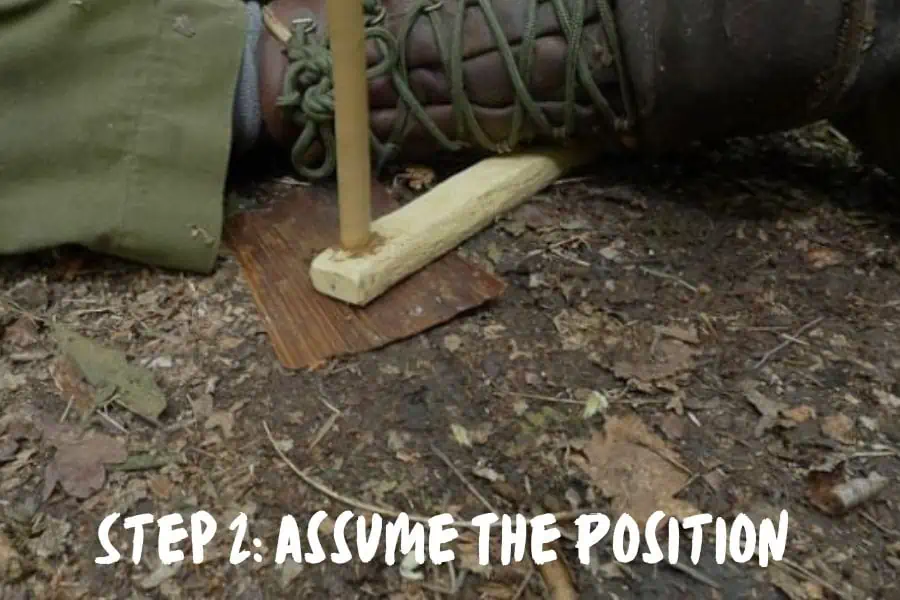
Getting an ember burning is going to be a lot easier if you're in the right position.
Put your fireboard down on the ground and kneel down onto it, holding it down securely with your knees.
That way, you can keep the fireboard in place and easily use your bodyweight to apply pressure while you're drilling.
Step 3: Start Drilling
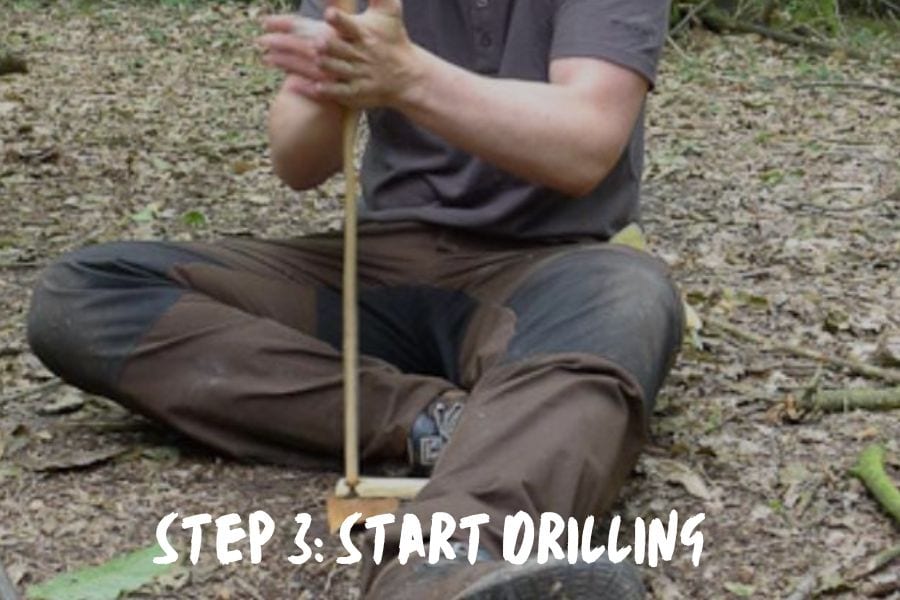
Now, here's the hard part.
You're going to have to do quite a bit of drilling before you see any smoke, let alone an ember.
Take your spindle and place it between your palms while they're pressed flat against each other.
Place the pointy end of the spindle into the hole you created in step 1.
Rub your hands together quickly to spin the spindle, and at the same time, push the spindle down into the fireboard by moving your hands up and down as you rub them together.
When you start to see smoke, don't stop!
Keep rubbing even quicker and pushing down even harder, and you'll soon see a small ember form on the fireboard.
The hard part is done, but don't relax just yet. You still need to light the fire.
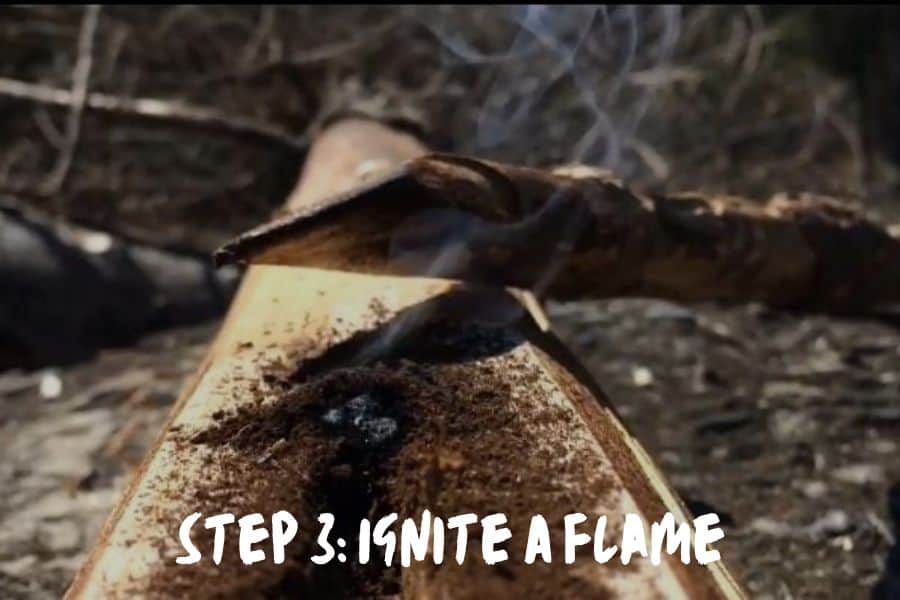
Step 4: Ignite A Flame
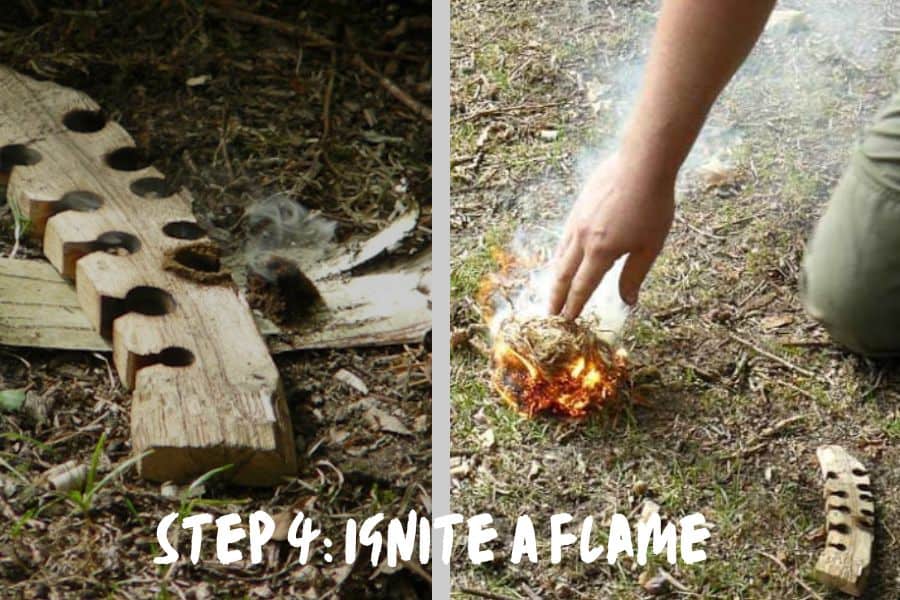
Once you have a burning ember, place it underneath your tinder bundle.
Then, blow gently onto it. At this point, you should start to see a flame, and the dry tinder should start to catch fire.
You can then transfer it to your fire pit and add your kindling.
Once that's lit, you can lay down some larger sticks and pieces of wood – just like you would if you were building a campfire any other way.
And there you have it.
Remember, patience is key. This isn't a method you can use to get a campfire going quickly and easily.
Be prepared to put in some time and elbow grease. But if you keep at it, you'll eventually end up with a roaring campfire to light up your campsite.
The Bow Drill Method
Next, we have the bow drill method.
Like with the hand drill method, this takes a good amount of time and effort to get a fire going.
That being said – the bow drill method is a heck of a lot easier on your hands than the hand drill method, so there's that.
On the other hand, you also need a few more requisites. Nothing you can't find around you in the wild, though.
To start a fire using this method you'll need:
- A fireboard
- A stick
- A fire bow
- A bearing block
- Firewood
You're effectively doing the exact same thing as the hand drill method, just in a slightly different way and using a few additional tools.
Step 1: Prepare Your Fireboard, Stick, Bow, & Bearing Block
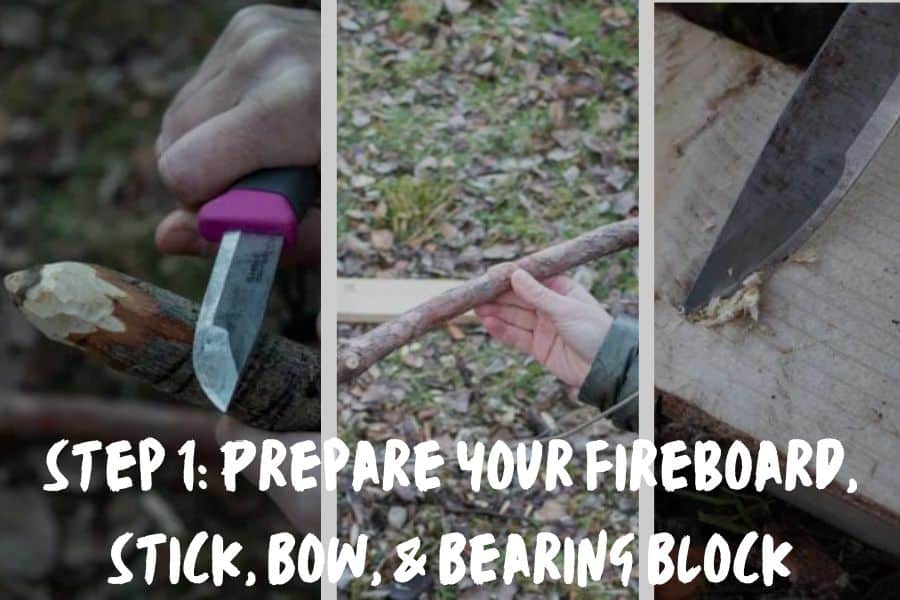
The fireboard and stick should be prepared in the same way as for the hand drill method.
Cut a V shape and shallow hole in your fireboard, and sharpen and straighten your stick.
To create your fire bow, you'll need a curved, almost C shaped stick. Ideally, you want it to be a bit thicker than the other stick you're using.
Take whatever string or rope you have available and tie a length of it from one end of your C shaped stick to the other.
Paracord works really well, but you can use just about anything from shoelaces to tree vines (if they're strong enough not to snap).
For your bearing block, you need a small, thick block of wood with a hole drilled into it where your stick can sit comfortably.
You'll need to lubricate the hole so that the stick can spin freely as you twirl it with your bow.
This can be done with a dab of petroleum jelly.
If you haven't got any, you can use grass, fresh leaves, or even a slug if you have the heart to crush the poor little guy.
Step 2: Start Drilling
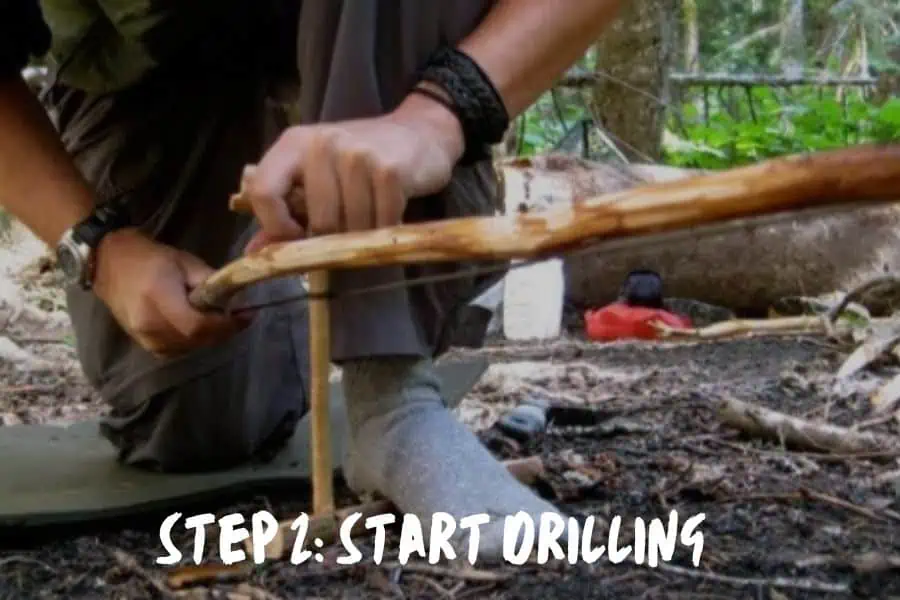
Position your drilling stick in between your fireboard and your bearing block. Hold the bearing block firmly to keep the stick steady.
Then, take your bow with your other hand and start rubbing it against your stick, while moving it up and down as you do so.
Imagine you're sawing through the stick with your bow.
Again, this is going to take a while, so don't give up if it isn't happening straight away.
Eventually, you'll start to see smoke, and just like with the hand drill method, this is your cue to speed things up.
Keep drilling harder and faster until you have a nice, hot, burning ember on your fireboard.
Step 3: Ignite A Flame
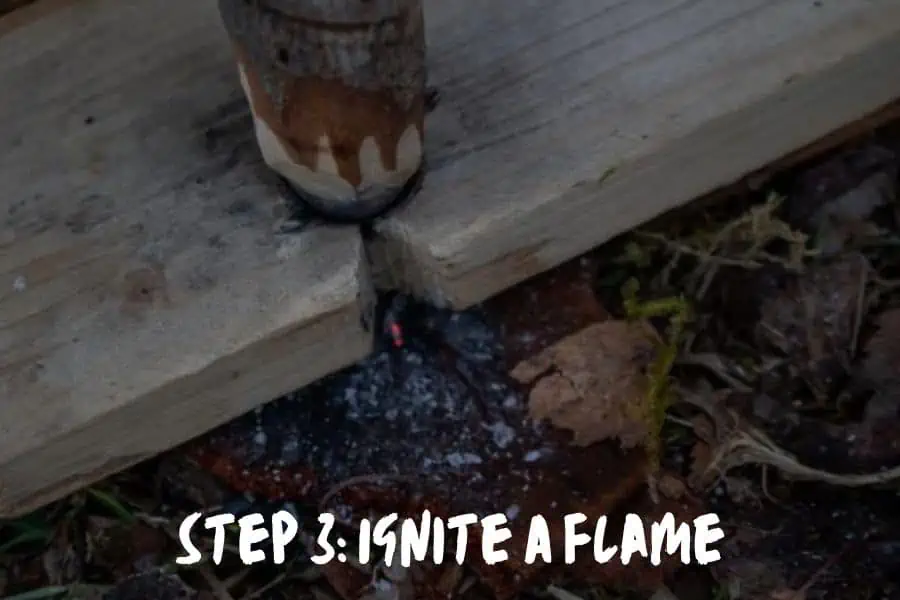
This step is exactly the same as the previous method.
Take your burning ember, place it under your tinder bundle, and blow gently.
By blowing on the ember you'll be able to ignite a flame, which will get your tinder burning.
Then, add your kindling and firewood logs to get your campfire in full swing.
And voila! Time to get the marshmallows out.
The Fire Plow Method
And finally, we've got the fire plow method.
The last two methods we talked about used a twirling motion to create friction.
The main difference with the fire plow method is that it uses a back and forth motion to achieve the same result.
For this method you'll need the following things:
- A plow board
- A stick
- Firewood
Again, the stick and firewood remain the same as in the previous two methods we looked at.
The only difference is in the fireboard. This time we'll be using a plow board, which is fairly similar, but a little bit different, as we're about to see.
Step 1: Prepare Your Plow Board & Stick

Take your stick and sharpen it with a knife. Cut off any bits and pieces to make the stick as close to perfectly straight as you can.
Then, take a flat block of wood, like a block you'd use to make a fireboard for hand or bow drilling.
Instead of cutting out a V shape and a hole, you want to carve out a trough down the middle of the block.
Your trough should be about a foot long and an inch wide.
Step 2: Start Plowing
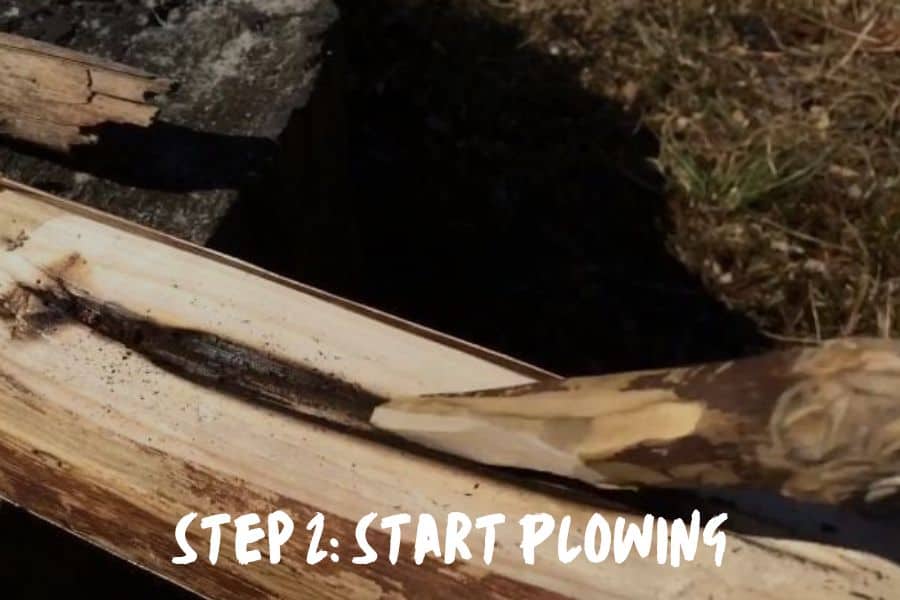
Place your plow board flat on the ground, and slide your stick up and down the trough at a 45° angle.
Once you've created a nice amount of dust, start plowing more vigorously, until smoke starts to appear.
You probably get the picture by now, but again – this'll take a while. You'll definitely break a sweat before you manage to produce any smoke.
Once it starts smoking, keep plowing until the dust catches fire.
That's your ember, and it means you're ready to light your flame.
Step 3: Ignite A Flame
Transfer your burning dust onto your tinder bundle, and blow gently until you get a flame.
If you read step 3 of the previous 2 methods, you already know the rest – kindling, firewood logs, marshmallows, etc.
And that's all there is to it.
Just make sure to maintain a 45° angle while you're plowing. That's definitely the key to success with this method.
Choosing The Right Wood
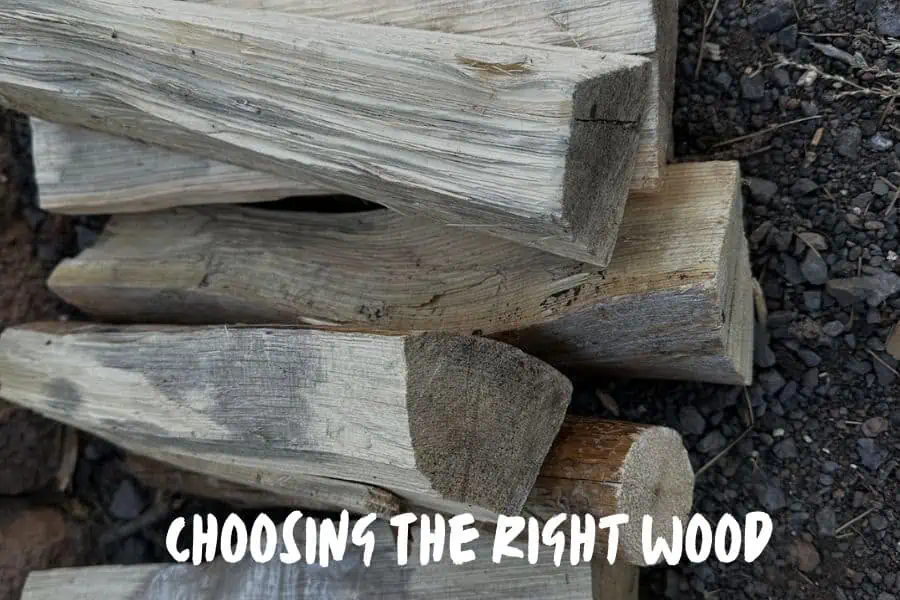
The three stick methods we've covered above are reliable and consistent.
However, if you don't have the right kind of wood, you aren't doing yourself any favors.
First of all, the wood that you use needs to be as dry as possible. If there's too much moisture in the wood, you're destined to fail.
If you aren't using the same type of wood for your fire stick and fire board, make sure that your stick is made of harder wood.
Some examples of wood species that are good to use include:
- Willow
- Sycamore
- Yucca
- Bamboo
- Cottonwood
- Dogwood
Just make sure you don't use wood that's toxic to burn – like spruce, poplar, or alder.
If it's been raining or you're just in a particularly damp area, you might not be able to find wood that's dry enough.
Don't worry – there's still hope. If you've got a hatchet, you can try chopping off the bark and outer layers of wood until you get to the dry wood in the center.
Chop it into small, thin pieces to use as kindling. Once you have a small fire burning, you can place some more wood around the fire to dry it out.
Preparing Your Fire Site
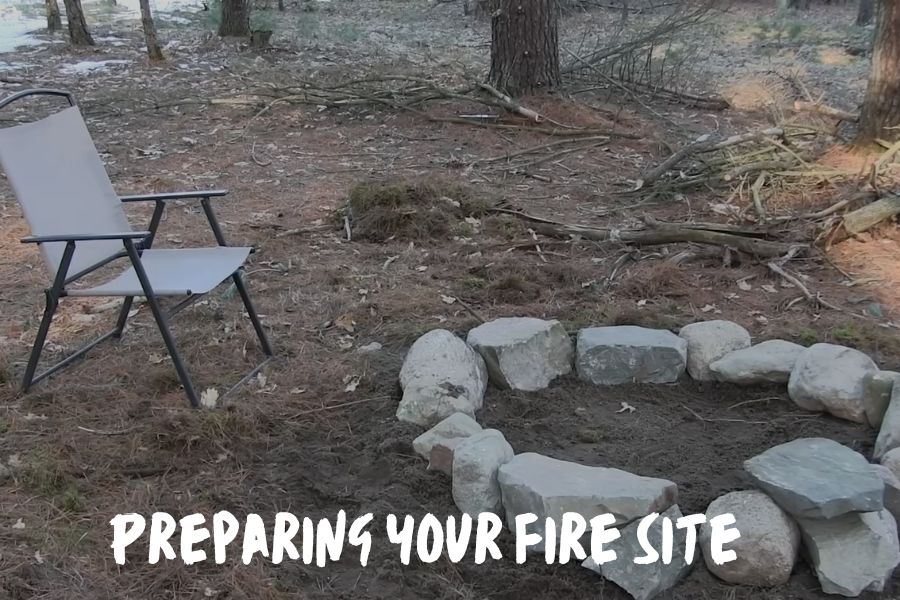
Before you start creating sparks, it's important to prepare your fire site appropriately.
Your fire site should be a clear, flat spot on the ground. You can create this by brushing away sticks and other debris from the space with your hands.
It's always a good idea to ring the fire area with a barricade of rocks to contain the flames as they grow.
For this, grab a few small to medium-sized rocks and place them in a small circle with space in the middle for the fire.
Next, prepare your materials. It's always best to have all of your kindling and tinder gathered and ready to go before you start producing sparks.
This way, you'll be able to place it directly over the sparks to catch and grow the fire in the moment.
There are a few ways to gather and organize kindling and tinder.
One of the best methods is to gather enough wood for the first portion of the fire and divide it into small, medium, and large pieces.
As you build the fire, you can work through these piles to grow the flame.
Enhancing Your Chances of Success At Starting a Fire
Using Proper Form & Technique
Creating fire from sticks can be tricky, so it's important that you follow the correct technique.
Even one wrong move can make for a frustrating night of fire-building.
Before you head out to your campground, make sure that you have done your research on the correct form and technique.
No matter which friction technique you use, following the specific directions will help you build that fire!
Ensuring Optimal Friction
The common factor of the above methods is they all use friction to create heat and embers.
If you create enough friction with the right set-up and wood, you can create an ember.
To get the highest chances of optimal friction, your wood needs to be as dry as possible.
If the wood has a high moisture content, you won't be able to create enough friction to create an ember or ignite a flame.
Environment & Weather Considerations
It's no surprise that starting a fire with friction can be especially tricky in wet weather conditions.
However, even though wet conditions make it a more difficult process, it's still very possible to create enough friction to make sparks.
That being said, your chances of success are less when in a wet environment or bad weather conditions.
In these cases, you should consider bringing a different type of firestarter with you as a backup.
Conditioning & Curing Your Wood
Conditioning and curing your wood is all about making sure that your wood is as dry as possible.
In fact, the most successful firewood has a moisture content percentage of just 15-20%.
On the trail, finding dry wood can sometimes be a difficult task. If you find dry wood, your priority should be keeping it as dry as possible.
You can do this by wrapping it in a tarp (both underneath and on top of the pile) to prevent it from getting exposed to moisture.
If you can only find wet wood, your options are slightly different.
The best approach is to find the driest wood possible to create a fire (which can be found under large tree canopies and other natural shelters), then laying your damp wood out around the fire to dry in the heat.
Practice & Patience
Although underrated, practice and patience are perhaps some of the most important factors when it comes to natural, friction-based fires.
Repetition and perseverance will be necessary during the learning process of this technique.
This technique can be tricky to learn – and even trickier to master – but will be a great trick to have in your back pocket once you know it!
Tools & Aids
If you want to get started learning about friction-based fires but are intimidated by the idea of making all of your materials, I have good news!
There are many manufacturers, including Amazon, that create premade kits for friction fire-starting.
This way, you can focus on getting the technique right, rather than spending your time creating the materials themselves.
FAQs
What Is The Best Way To Start A Fire With Sticks?
This depends on your preferences. When it comes down to it, the best technique for you to use will depend on the one you learn to do the most effectively.
If you're just starting out, the hand drill method will likely be the most straightforward method to begin with.
To find out for yourself, start experimenting with the different techniques to see which one you like the best!
How Hard Is It To Start A Fire By Rubbing Sticks?
It can be difficult, but it's not impossible! With lots of practice and patience, you'll be able to get a hang of it in no time.
The key is accepting that it will take some time and being patient.
What Is The Best Wood To Start A Fire With Sticks?
Softwood – including cedar, poplar, birch, and oak – is going to be the best wood to start a fire with the above methods.
It is more flammable than hardwood and will create more spark-catching wood dust throughout the process.
However, hardwood is great for maintaining a fire for long periods of time. So, once you have a decent fire going, use hardwood to make it last.
What Is The Best Tinder For Starting A Fire With Sticks?
The best type of tinder will be lightweight and highly flammable. Depending on where you are camping, tinder can include leaves, bark shavings, dry grass, or dry pine needles.
How Do I Maintain The Fire Once It's Started?
Once you have a small fire going, you can treat it just like any other fire! To make the fire larger, add more kindling, sticks, and logs.
The trick is to build up the fire gradually so that it doesn't get smothered by too much fuel.
To maintain the fire, make sure to add fuel to the fire every half hour (or as needed) to keep it going. When you've decided you want to let it die down, stop adding sticks to the fire.
How Long Does It Typically Take To Start A Fire With Sticks?
Whenever you're learning to do anything new, it'll always take you longer in the beginning. Starting a fire with sticks is no different.
A lot of people get discouraged and give up too quickly, not knowing that all they need to do is keep persisting.
You might have to drill or plow for as long as 15-20 minutes before anything happens.
But the next time will be a bit quicker, and the time after that. Eventually, you'll be able to start a fire in as little as 5 minutes.
If you get really good at it, you might even manage to do it in as little as 30 seconds. But that takes some serious skills.
In Summary
As you can see, all of these methods are fairly similar. They all use sticks to create friction to create fire.
The only difference is exactly how that friction is created. All stick-based methods are a lot of work, but practice makes perfect – so don't give up!
And once you've got your fire up and going, all that's left to do is sit back, relax, and roast up some tasty campfire treats.
Also See: