


Isn't there something magical about sitting around the campfire? Roasting marshmallows, telling camping stories, there's nothing like it.
A proper campfire does many things – it warms your body, cooks your food, and lights up the darkness of the woods.
Unfortunately, you can't have any of those if your fire extinguishes itself in 5 minutes. Learning how to build a great fire is a valuable skill that you can use for life.
So, pay attention while I show you how to build the biggest, hottest campfire you've ever seen.
Step 1: Research And Preparation
First things first, do your homework.
Before you even light a match, you have to prepare your site for a campfire properly.
Are Campfires Even Allowed?
Don't start building your big, beautiful, roaring fire until you first check if campfires are allowed in the area.
They could be banned at your campsite for various reasons. That includes (but is not limited to) weather, archeological issues, or dry season.
Look for posted signs or ask the ranger station about fire bans.
If they are allowed, then move to the next step, which is checking the fire danger level. If the fire danger level is high (yellow), you should forego building a fire. The fire danger signs are usually posted on the road or at the ranger's station.
Check The Weather Conditions
Even if campfires are allowed at your campsite, always be mindful of the weather conditions.
An approaching storm or high winds can quickly turn even the smallest campfire into a disaster. Before you know it, your campfire could turn into a raging inferno, swallowing everything in its path!
You don't want your face plastered on TV as the guy who started a forest fire in a national park, right?
So if there's even a slight chance that the weather could turn windy, it's best to take a break and burn wood at a later time.
Build Your Fire Bed
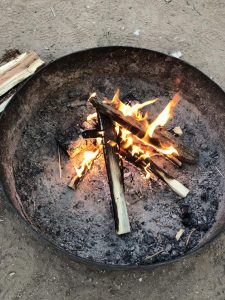
If you're camping in a developed campsite, there are usually several designated fireplaces or fire rings.
You should always build your fire in those since it'll lessen your impact on the environment and keep your fire contained. Even if you're wild camping, use an existing fire bed whenever possible.
But what if you're camping in more rugged, undeveloped areas?
Then you need to create your own fire bed.
First and foremost, always keep a bucket of water and a shovel nearby. These act as insurance in case you lose control over your fire.
Next, evaluate the site before building a fire bed.
Make sure you build your fire bed at least 10 feet away from anything that could catch fire, such as dead grass, overhanging tree branches, or your tent. Fire, by its nature, is unpredictable. It's best to be 100% safe when setting your campfire up.
Your fire bed should be on bare earth. If you can't find a patch that will work, dig the ground with a shovel, and make your own. Be sure to remove all plants and grass and to leave only the dirt.
Finally, create a ring of rocks the size of your fists around the fire area. These rocks should be spaced apart so that the air can circulate at the bottom of the fire. Avoid using wet rocks since these can spit moisture onto your fire.
Step 2: Gather & Chop Your Wood
With your fire bed all set up, now it's the time to search for wood to build your fire.
There are 3 types of wood you need to build a proper campfire:
- Tinder
- Kindling
- Fuelwood
Tinder
It's impossible to build a great campfire without a good handful of tinder. You can't just take a match to a giant log and expect it to light. Instead, start with tinder.
Tinder catches fire fast, but it also burns fast. You'll want to gather small, flammable materials such as dry leaves, small twigs, dry grass, and so on.
If you want, you can even bring your own tinder such as dryer lint or char clothes. This is especially useful if everything outside is still wet from the rain.
Kindling
Now that your tinder is rolling, it's time to scale into some slightly larger wood. You can't go from tinder to large fuelwood immediately – that will just smother your little fire.
That's where kindling comes in. Its role is to help shape the fire.
This type of wood is one step up the size from tinder. You'll want to gather a bunch of small twigs and branches the width of a pencil.
A side note: if all you have around you is wet twigs, try using your pocket knife to whittle down the damp bark and expose the drier wood underneath.
Fuelwood
Finally, we have the fuelwood.
This is any type of heavy wood that will keep your fire going for an extended period. It's the primary fuel for your fire.
Now, you might be itching to get those enormous logs of wood you've seen people use on TV. While you can do that, it's not really recommended because it's going to take a long time for them to catch fire.
Instead, look for branches that are the width of your forearm.
Where To Get Wood
Now with all that said, where do you actually get the wood you need?
For starters, never cut branches, even the dead ones. Birds and wildlife use dead branches for nests and other purposes.
Always collect the wood from the ground.
Needless to say, you'll want to collect only dry wood that snaps easily.
If the wood bends before breaking, it's too "green." If you use this type of wood for your fire, you'll get a lot of smoke, but no flame.
If you're a beginner camper, gather more wood than you think you'll need.
Wood, especially tinder and kindling, burns much faster than you'd expect. A good rule of thumb is to gather twice as much wood as you need.
Also See: How Much Firewood Do I Need For Camping? – And Where To Buy It
Chop The Wood
Once you have gathered your wood, you will need to split the wood using a hatchet or axe. To do this, you'll to do the following:
- Make sure you have the right equipment (hatchet, gloves, safety glasses).
- Choose the logs that need splitting
- Prepare the splitting surface
- Determine the axis of cutting
- Start splitting the wood with your hatchet or axe
That's all. Once you have the various sizes of wood that you'll need for the fire, you'll be ready to start it.
Step 3: Lay Your Fire
You might be surprised to learn that there are many ways to build a campfire.
"Fire lay" is a term for the layout of your firewood. Some of the more popular fire lays are:
- Teepee
- Log cabin
- Pyramid
- Lean-to
Teepee Fire Method
The teepee method of laying fire is quite simple.
You start by placing your tinder in the middle of your fire bed. Then, build a teepee (get it?) around the tinder wood using your kindling.
After the kindling is set, start to add smaller fuelwood around it in the same teepee shape.
This is probably the easiest and most popular way to lay the fire. It's excellent for cooking, and best of all, it lights up really quickly.
However, it does require a lot of time and fuel, so be sure to stock up if you're using this method.
Log Cabin Fire Method
If you want a long-lasting campfire, consider the log cabin method.
Here you start with your tinder and kindling in the middle of the fire bed. Then, add two fuelwood logs on each side of the tinder and kindling pile. These logs should be parallel to each other.
Next, add another two logs on top of the previous ones, but arranged in that way they form a square.
Keep stacking the logs until the pile is 3 or 4 logs high.
Pyramid Fire Method
This is also known as the "upside-down" method, and it's easy to see why.
Instead of starting with smaller twigs and adding larger ones as you go along, you reverse the order.
Start by laying down your most massive logs next to each other at the bottom of the fire bed. Then, add the next layer of logs onto them, but arrange them in the other direction.
Continue doing this for 3 to 4 times until the pile is tall enough.
Finally, add a small teepee of tinder and kindling on top of this pile. When you light it up, the teepee will burn and continue to light your pyramid.
This fire lay method is an excellent choice when you want a significant fire that doesn't require a lot of babysitting.
Lean-To Fire Method
Get a large log and lay it on the ground.
Next, lay your kindling at a 30-degree angle on the log.
Put the tinder underneath the kindling.
After that is done, add another layer of kindling over the first ones. This time feel free to use larger pieces of wood.
Step 4: Light Your Fire
Now that you have your beautiful wooden structure up, it's time to burn it.
I suggest you use a fire starter if you've got one. Alternatively, you can use a match to light your fire. It can be hard to reach tinder in some lay structures with a lighter, but it's still possible if that's all you have on you.
If you haven't got a fire starter or a lighter, you can use friction to create an ember by rubbing two pieces of wood together.
You want to make sure to light the tinder in the center of the structure as fast as possible. After you light it, blow gently into the flame to fan it.
This will help a lot to get your fire going.
Step 5: Keep The Fire Going
You got your fire going?
Awesome.
Now it's the time to keep adding to it and maintain it.
Keep adding wood to it as time goes by, but slowly. If you add too much wood at the time, you run the risk of smothering your fire and putting it out.
And another thing: don't use your fire as a trash can. Only add wood and paper to it to keep it going. Other stuff, such as cans, plastic wrappers, aluminum foils, and so on belong in a proper trash can.
Lastly: never leave the campfire unattended! Things can quickly get out of control so always have someone keep a watch over it until you put it out.
Step 6: Extinguish Your Fire
Be sure to give yourself plenty of time to put the fire out before you go to bed. Generally, you should start putting out a fire about 20 minutes before bedtime. By that time, the embers should have died down and it's no longer raging.
The best way you put out a fire is by pouring water over it, then stir the ashes with a stick, and then pouring water over it again. Don't pour water over the fire bed because the next camper won't be able to use it.
When you stop hearing hissing noises, you know you're almost finished.
How do you know you're really done? Easy – just touch the ashes with the back of your hand. If they're cold, it's safe to leave. If not, keep sprinkling water and stir ashes until they are cold.
Don't have water nearby?
Shame on you.
But seriously, if you're short on water, you can use dirt or sand to put the fire out – just be sure you put out every single ember, not just the glowing red ones.
Lastly, be sure to follow the leave no trace principles. Following these mean you minimize your impact on the environment and help keep nature clean and pristine for us all.
Conclusion
So there you have it.
You might think that you wouldn't need a guide as long as this one to learn to build a campfire.
However, if you want to do it safely and correctly, you need to be aware of all the rules and techniques I covered in this post. After all, an ounce of prevention is worth a pound of cure, isn't it?
So stay safe, respect the environment, and have fun building your fire!
Next up: Campfire Safety Tips: How to Stay Safe Around the Campfire