


Learning how to take down a tent is an incredibly important step in becoming self-sufficient in the outdoors!
Not only will it make you more independent, but learning how to take down a tent will also ensure that your tent stays in good shape for a long time.
In this article, we'll review the best way to take down your tent – and give you some tips and tricks for handling the process like a pro.
How To Take Down A Tent: Step-by-Step Guide
Taking down a tent can seem like an intimidating task at first, but it's not nearly as difficult as it seems!
Watch the video below, or read the following sections to see a step-by-step process for breaking down your tent.
Step 1: Remove Items
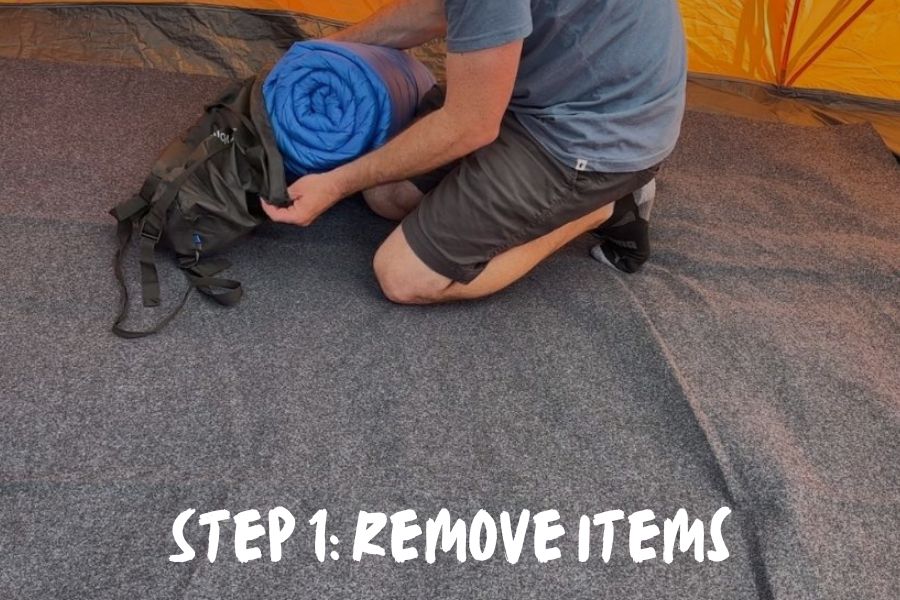
First, make sure all objects have been removed from the inside of the tent.
This includes bigger objects like sleeping bags and pads, as well as smaller items like keys, toiletries, and glasses.
This step is especially important to remember for the smaller, more essential objects you may have brought with you on your trip.
Once you've packed up your tent, it can be a pain to go through the fabric again to get your car keys!
Step 2: Sweep & Clean

Once you've removed all the items from the interior of the tent, it's time to clean!
For this step, you'll want to remove any larger pieces of trash and place them directly in a trash bin – we don't litter at Wilderness Times!
Once the larger pieces of trash have been dealt with, it's likely there will be dirt and natural debris in the bottom of the tent's interior. This is totally normal.
All you need to do for this debris is brush it out with your hands, or if you're car camping, with a broom and dustpan.
If you notice any dirt on the outside of the tent, try to brush it off with your hands or a damp towel.
A little bit of dirt on the tent is fine while you're camping. But if you're noticing a lot of dirt, mud, or bird feces on the tent, you'll want to address as much as you can on-site.
Not only will this make it easier to clean your tent at home, but it'll also help keep dirt from spreading to other parts of your tent once it's folded up.
Step 3: Open Zippers & Vents
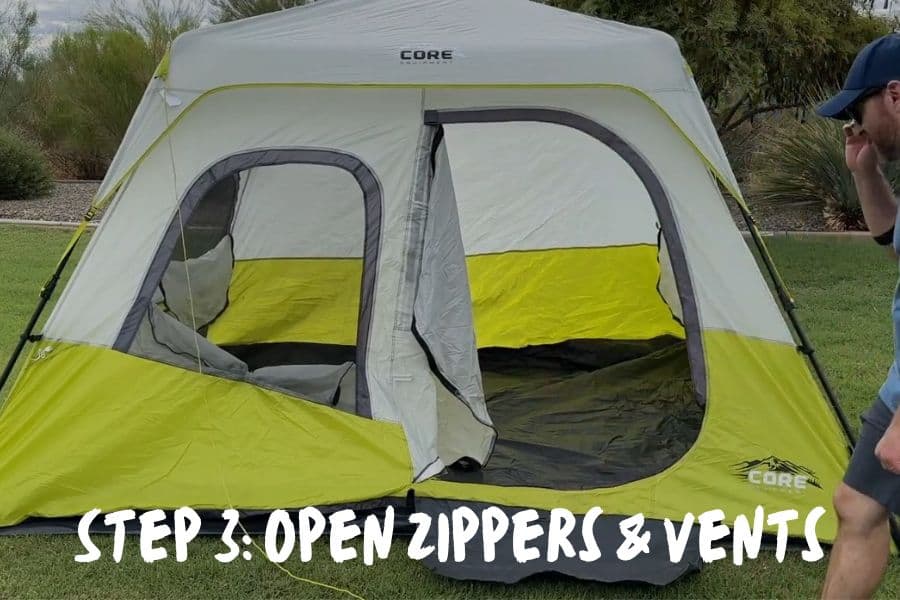
There is conflicting messaging as to whether or not it's best to keep your tent doors zipped or unzipped during the take-down process.
Proponents of the zipped option like to keep everything zipped up so that tent flaps don't get in the way of the folding process. This can make the entire structure less cumbersome.
Unzipped doors help make sure that air can escape during the take-down process.
This makes it so campers can avoid inconvenient air bubbles when they fold up the tent.
Both of these methods have their advantages, so we recommend a healthy medium.
When taking down your tent, make sure that the doors and vents are halfway open.
Keeping the doors and vents mostly open will ensure that air can escape while keeping the structure intact.
Step 4: Remove Tent Stakes & Guylines
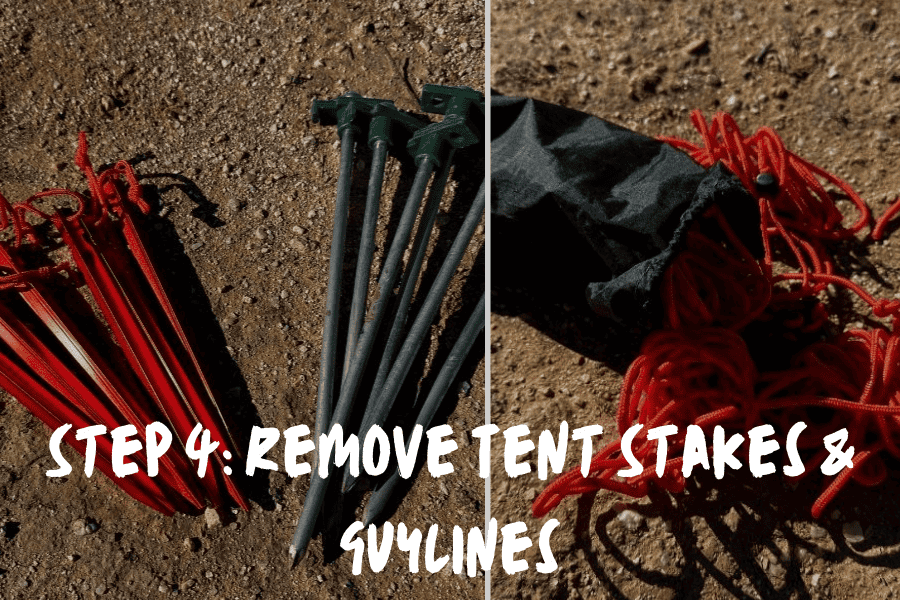
The next step is to remove the stakes for the tent and guylines. This will loosen your tent structure, unclip the rain fly, and free up all of your guylines.
When I'm taking down a tent, I generally circle it and take out the stakes as I go. I can make sure that all the stakes are taken out and accounted for before placing them in their bag.
Please note: If you're breaking down camp in high winds, it can be advantageous to keep the corner stakes inserted.
This will keep the tent connected to the ground while you deal with the rain fly and poles.
Step 5: Remove The Rain Fly
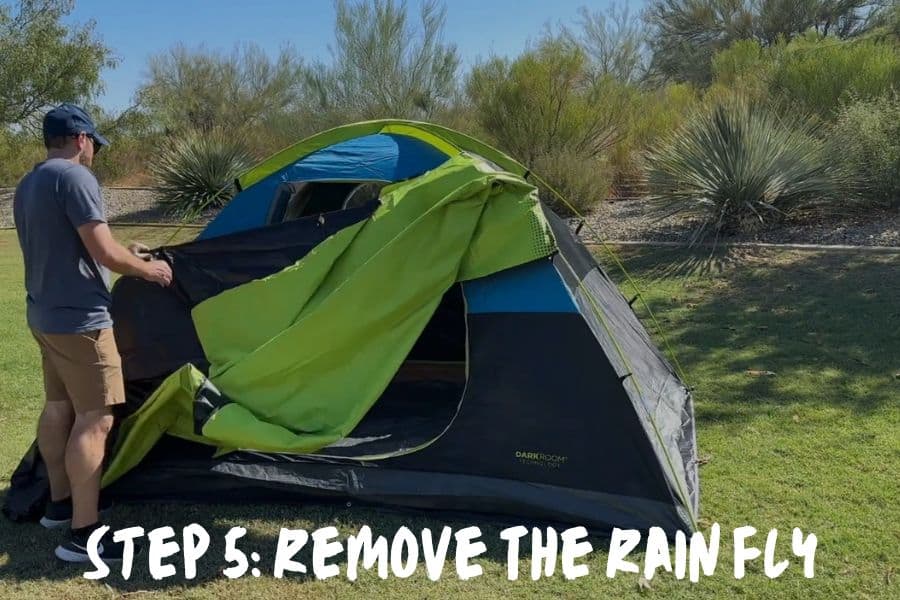
Once the tent stakes have been removed, the edges of your rain fly will be loose. Some rain flies will have a series of clips throughout the structure that connect it to the poles on the tent.
Once the clips are unclipped, pull off the rain fly from the larger tent structure and shake off any water or moisture that may have gathered on top of it.
It's general best practice to not pack up a tent if the materials are wet. However, sometimes it's not practical to wait until a rain fly is completely dry to pack up your tent during the mornings of a longer trek.
If you're packing up your tent on a longer trek, make sure you shake off the rain fly before packing up.
Then when you get to your next campsite, set up your tent earlier in the day to give it time to dry off before using it again that night.
If you're headed directly home and don't have time to dry your rain fly that morning, make sure to place your tent in a warm, dry spot to dry out when you get back.
You need to make sure it gets completely dry before you store it away.
Step 6: Remove & Collapse Poles
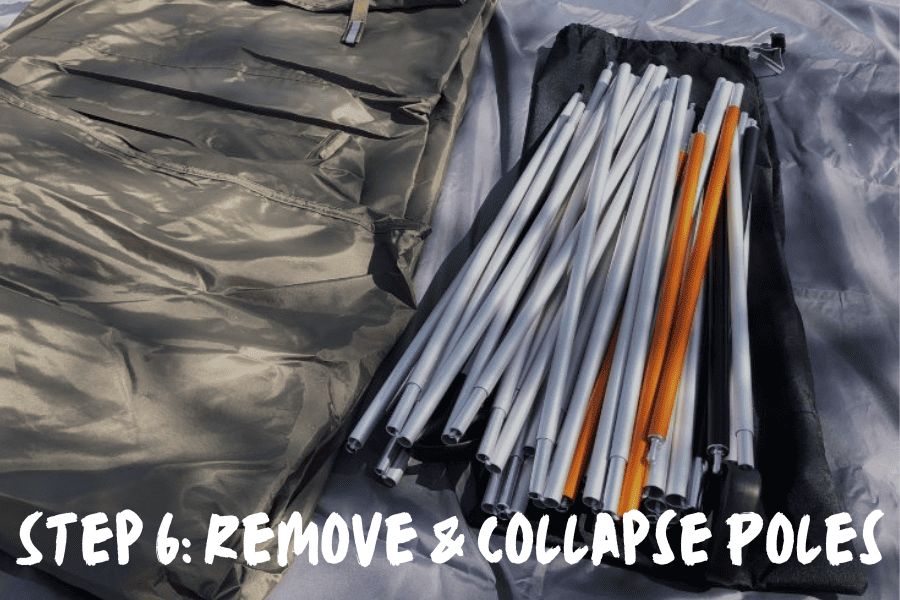
Once you've removed the rain fly, the core tent structure should be still standing.
First, disconnect the poles from the tent structure and unclip any clips connecting the two parts. This step will also include taking the end of each pole out of the corners of the tent.
Once the poles have been completely disconnected from the tent structure, you will be able to slide them out of their pole sleeves and collapse them.
Most poles are made of a number of short segments of hollow metal that connect to one another at each end.
All of these segments are connected via a cord that runs through the middle of the entire thing.
To collapse a tent pole, pull the pieces apart at the ends, then fold them over one another until they are in an orderly bundle.
Most tent models will come with a pole bag specifically for keeping your collapsed tent poles consolidated in your larger tent bag.
Once you've collapsed them, place the poles in this bag and set it to the side. It'll come in handy for your folding process.
Step 7: Fold & Roll
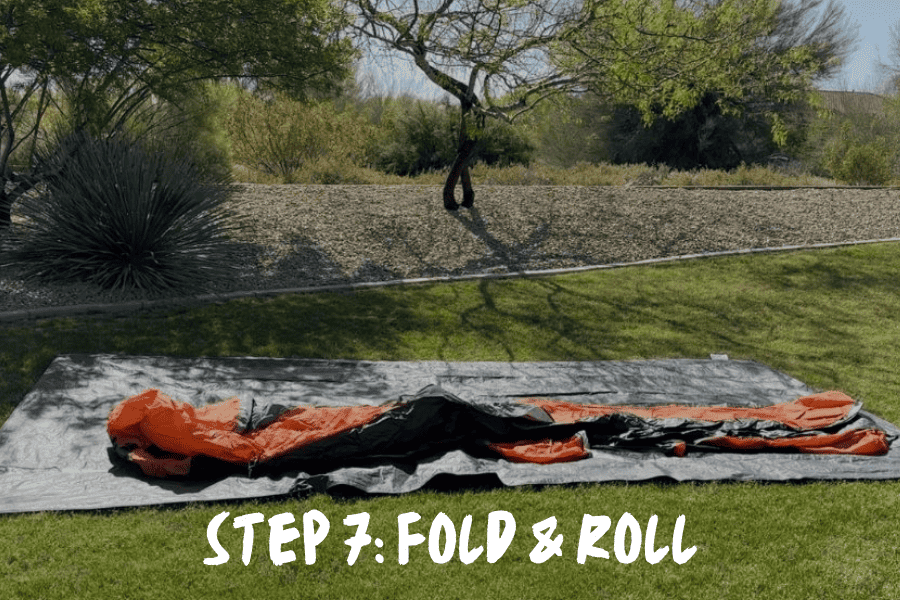
At this point in the process, you should have your poles collapsed and placed in their bag, your rain fly separated from the tent, and the tent collapsed on the ground.
As you fold your tent structure, you want to focus on folding any extra fabric, including the porch or vestibule fabric, towards the center of the fabric.
Then fold each half of the fabric in towards the middle, then again on top of one another.
Follow the same process as you fold the rain fly. When you're done, they should both be the same width as the tent pole bag.
When in doubt, lay the pole bag down on the ground and use its measurements to guide your folding process.
Once you've folded the rain fly and tent, you should have two long, narrow-ish pieces of fabric. Then, lay them on top of one another.
It's likely the tent will be longer than the rain fly. Lay the pole bag on top of the two layers, then start rolling the fabric up with the poles in the middle.
As you roll all the parts together, try to keep them as tight as possible to keep excess air from making your roll bulky.
You will likely encounter air bubbles in the tent structure as you roll. This is completely normal, just make sure that you press down on the air bubbles to get rid of them.
When you're done, you should have a compact roll of tent fabric with the poles in the middle.
Step 8: Pack Everything Into The Tent Bag

All the tricky parts are done! At this point, all you need to do is place the compact roll of the tent, rain fly, and poles into the tent bag. This part doesn't need to be especially neat.
And, if you've completed the steps above well, the tent roll should fit right in.
If you didn't include the tent stakes with the tent poles during the initial roll, make sure that you include them in the tent bag at this point.
Storage & Maintenance
Proper tent cleaning and storage is an incredibly important part of your tent's overall maintenance.
But if you take the right steps, your tent will last you for years to come.
Dry The Tent Thoroughly Before Storage
When you get home from your campout, set up your tent outside in a dry spot to air out and dry completely.
The main purpose of airing and drying out your tent is to avoid any growth of mold or mildew in the tent fabric.
It can cause long-term damage to your tent and shorten its overall lifespan.
When I do this, I set up the tent structure on its own, then lay out my rain fly in a separate spot.
This way, the two parts will be able to get completely dry without impeding the drying process of one another.
The timing of this step will depend on how wet your tent got on your campout, as well as the weather during the drying process.
I recommend taking at least a few hours to air and dry out your tent to ensure that all parts, including the seams and zippers, are completely dry.
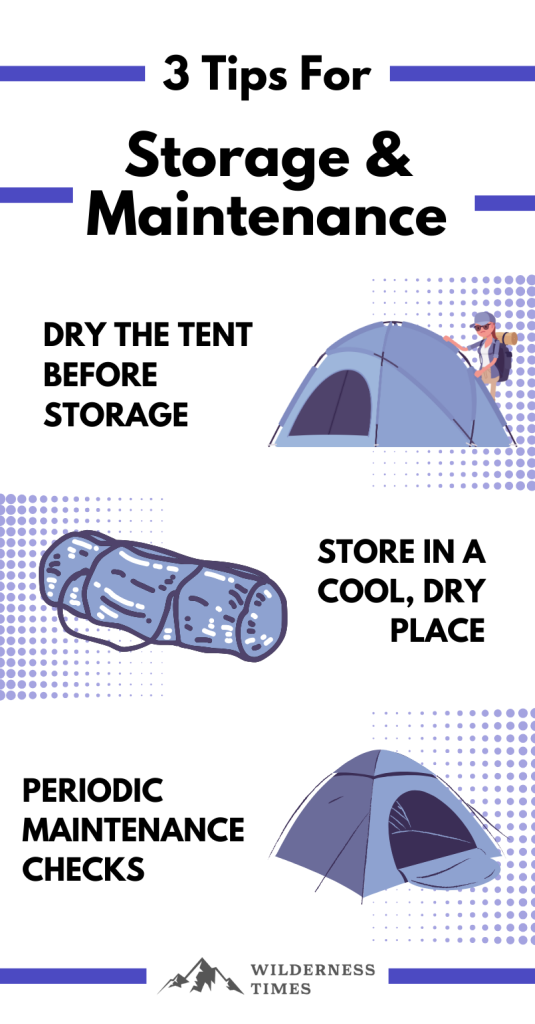
Store In A Cool, Dry Place
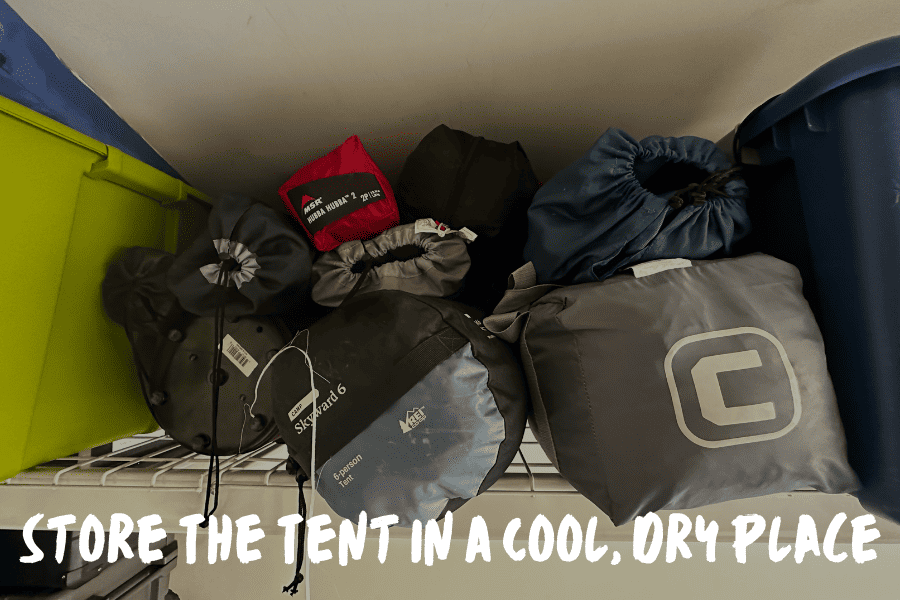
To make sure that your tent stays in great condition for a long period of time, it's important to choose a storage space that is cool and dry.
Keeping your tent in a cool, dry space will keep it protected from moisture that can create mold and mildew, as well as any heat or unnecessary sunlight that can damage the fabric.
In addition, when you're folding up a tent for long-term storage, it's best to fold it loosely instead of in a tight bundle. Folding loosely is important for two main reasons.
First, it prevents any unnecessary wear and tear on the materials from staying folded too tight for too long.
Second, this approach also creates spaces for any excess moisture to escape, further protecting against mold and mildew growth.
Periodic Maintenance Checks
Every so often, it's important to complete a thorough check of your tent to ensure that all of its features are working well and in good condition.
This doesn't have to happen after every single campout, but it's a good plan to complete one of these checks at least once a season.
When doing a maintenance check, take a look at all the seams and zippers to ensure that you can't see any mold or mildew growth.
If you see any mold or mildew, it's best to treat the spot right away to ensure that it doesn't spread.
In addition, make sure that all of the zippers are working and in good condition. Sometimes, zippers can get stuck or break along the seams.
Depending on the issue, you can take your tent to your local outdoor store, or treat it on your own.
Finally, complete a quick lookover of the tent fabric. Keep an eye out for any unusual wear and tear and make sure to monitor it on your next campout.
FAQs
What's The Best Way To Fold Or Roll A Tent For Storage?
No matter if you're rolling or folding, the key to keeping your tent in good condition throughout long-term storage is to keep it loose!
Loosely folding the fabric will ensure that there is no unnecessary wear and tear on the fabric and will leave space for any excess moisture to evaporate instead of creating an environment for mold and mildew.
How Do I Clean The Tent Before Packing It?
When you're on a campout, try to clean out the tent by throwing out any large pieces of trash, brushing out remaining dirt and dust from the bottom of the tent interior, and brushing off any dirt on the exterior of the tent.
You can do most of the cleaning on-site with a clean, dry cloth. However, if needed, you can use a damp cloth for especially stubborn stains.
It's okay to have a little bit of dirt on your tent throughout your camping trip. You're in the wilderness after all!
However, try to brush off any large patches of dirt, bird feces, or mud that you find on the exterior of the tent before packing it away.
Should I Remove The Tent Stakes Or The Tent Poles First?
It depends. For the most part, it's best to take all of the stakes out first, and then continue with the breakdown process.
However, if you're in an especially windy environment, it can be advantageous to keep the four corners staked down while you deal with the rain fly and poles.
Because your tent is at risk of blowing away, keeping it staked down in these areas will ensure your tent doesn't fly away while you're breaking it down!
What Should I Do If The Tent Is Wet Or Damp When I Need To Pack It Up?
Sometimes, you will need to pack up a damp tent on the trail. If you find yourself in this situation, always start by shaking out your tent and rain fly as much as possible before packing it up.
Shaking out your tent will get rid of a good amount of moisture, but likely not all of it.
Never fear! When you get to your next camping spot (or return home), make sure you set up your tent to dry out.
If you're still on the trail, this should be the first thing you do when you reach your new camp. This way, your tent will have a few hours to air out before you have to sleep in it.
How Do I Prevent Mold & Mildew When Storing My Tent?
The best thing to do to prevent mold and mildew growth is not to leave moisture anywhere in the tent. And make sure to store it loosely folded in a cool, dry environment.
When you get home, set up your tent and let it air and dry out for a few hours before folding it and putting it away.
Once it's dry, make sure to loosely fold it to avoid trapping any excess moisture that can grow mold and mildew.
How Should I Clean and Store The Tent Stakes and Poles?
Depending on the weather during your last campout, you may need to wash some mud or debris off of your gear.
If you notice this, just take a clean cloth and run it over them. You can dampen the cloth to remove the especially stubborn dirt if you need.
If the stakes are especially dirty, you can wash or soak them in water to get the dirt off.
Why Is It Important To Fold Or Roll The Tent Tightly?
When you're out on the trail, folding or rolling your tent will help you can save space in your pack.
However, make sure you take it out of that tight fold/roll and fold it loosely for long-term storage.
Final Thoughts On Taking Down A Tent
Just remember, taking down a tent isn't as hard as it may seem.
Take it step by step, and you'll be a pro in no time!