

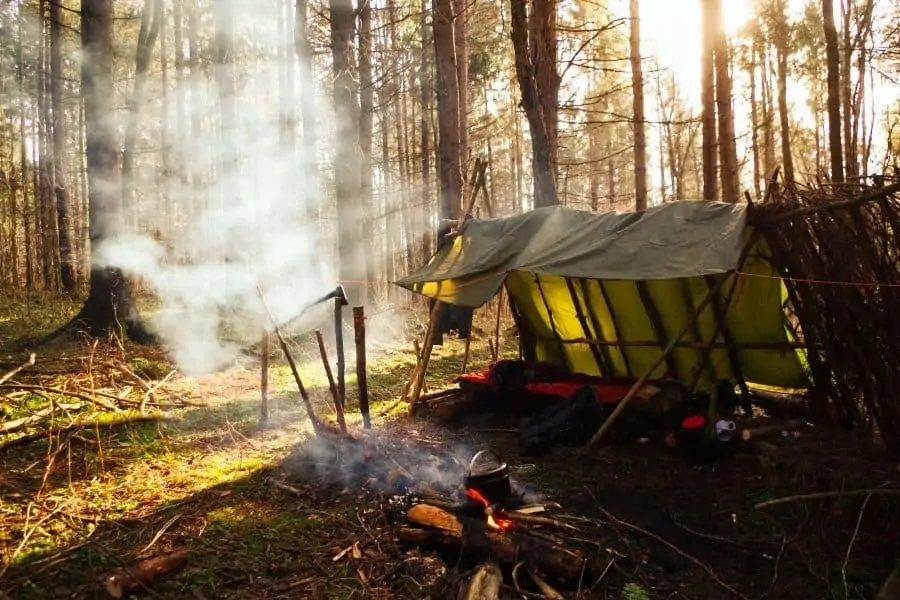
The tarp has got to be the most versatile piece of camping equipment. You can make a variety of different types of shelter with it – if you know how.
Heading into the wilderness without knowing how to properly set up a tarp for a specific weather condition can be disastrous.
But don't worry – I've got all the info you need to master the art of tarp camping into this article.
So let's dive straight in!
The Best Tarp Shelter Configurations
There are tons of ways you can set up a tarp shelter.
Learning them all at once would be overwhelming and, probably, unnecessary. But, there are eight setups that every camper should know:
A-Frame
This is definitely one of the simplest and most classic of the tarp shelter configurations (and classic tent types). It's easily done and works great for different weather conditions.
Look for two trees that are at least 9 feet apart (or more, depending on the size of your tarp). Then, tie the paracord around both trees at about 4 to 5 feet off the ground. Make sure your ridgeline is as tight as possible.
Then, throw the tarp over the paracord and stake each corner to the ground. It's important that all sides are taut, so that rain or wind can't mess up your setup.
Pros:
- Plenty of space to sleep 2 or more people
- Easy and fast setup
- Great during inclement weather
Cons:
- No groundsheet
- Somewhat limited headroom
The Tipi
If the A-frame and stealth shelter had a baby, it would be the tipi configuration. In this case, you're only going to attach one tie-out point to the ridgeline, while the others are staked to the ground, giving your shelter a classic conical shape.
This setup gives you room to sit, but it sacrifices some legroom. Just keep in mind that it won't keep you safe from weather elements as much as a stealth setup would.
Pros:
- More headroom to sit up within
- Utilizes a groundsheet
- Easy to setup
Cons:
- More open to the elements
- Less leg room
- Limited space inside The Tipi configuration
Lean-To Tarp
This setup is just as simple as the one above. In fact, the lean-to tarp is basically the A shape configuration cut in half.
Just like with the previous setup, you need to find two trees that are 9 or more feet apart, and tie a tight ridgeline around them. But instead of staking each corner to the ground, you'll do that only on one side of the tarp. Fold the other side over the ridgeline and use guylines to make it taut.
This configuration is suitable for sun and wind protection, but only on one side.
Pros:
- Fast and easy setup
- Plenty of room for gear
- Won't get smoked out with a fire
- Can modify into alternative shelters if needed
Cons:
- Not effective with strong winds
- Exposed to the elements
- No groundsheet
Ridge Line Lean-To
This is yet another shelter that you can make to stay safe from sun, rain and wind, depending on its direction. But in the case of storms, it won't be as effective.
This shelter is pretty much the same as the classic lean-to, with an additional "awning."
Pros:
- Sun and rain protection
- Wind protection from two sides
- Lots of space for gear
Cons:
- Not suitable for high winds or rain
- No groundsheet
The Stealth
As the name suggests, this setup is perfect for stealth camping. By this, I mean going into the wilderness and trying to stay out of sight from both people and dangerous animals, such as bears.
This low profile configuration requires a ridgeline, three paracord prusik loops and lots of tie-out points on the tarp. The ridgeline should be at about your waist height. Tie three prusik loops around the ridgeline and use them to attach one side of the tarp.
Stake out the middle tie-out points on the tarp and fold the rest underneath to create a floor for your shelter.
The low profile of this setup gives you no headroom and very little space inside. But that also makes it great for high winds.
Pros:
- Stable in strong winds
- Utilizes a groundsheet
- Low profile for stealth camping
Cons:
- No head room to sit up
- Longer setup time
- Limited space inside The Stealth configuration
Tortilla
Just by looking at this shelter, it's clear why it's named like this. It gives you decent sun and wind protection from one side, as well as flooring. It's easy to make, and you only need a single tree or a pole.
Lay the tarp in a diamond shape, with two corners facing a tree. Stake the bottom corner to the ground, and tie the other one to that tree. Then, stake out the other corners while making sure they're staying taut.
Pros:
- One of the easiest tarp shelters to set up
- Protection from wind and sun on one side
- Decent floor space
- Groundsheet
Cons:
- Not suitable for harsh weather
- Only offers single side protection
- Limited room to setup
The Tarp Tent
What if there are no suitable trees around for setting up a ridgeline? No worries, as long as you have a trekking pole to use as center support. All the edges need to be staked outwards to create a taut construction held by that center pole.
This is one of those shelters that works on a simple principle, but you'll need to practice pitching it, especially if you're solo camping.
Pros:
- No ridgeline or trees needed for this setup
- Great for rain and strong winds
- Minimal space needed for setup
Cons:
- Longer setup time
- Center pole reduces space inside
- No groundsheet
The Bivy Bag Cornet
This configuration is suitable if there's only a single tree that you can use. As the name suggests, this setup doesn't give you plenty of space inside, but it will definitely keep you safe from weather elements.
To make this shelter, tie a paracord around the tree at a height of 4 to 5 feet. Stake the other part of the rope to the ground. Throw the tarp over the paracord diagonally and stake its corners out. The floor should meet at one side.
Pros:
- Good wind deflection
- Great protection from the rain
- Groundsheet to protect from damp ground
Cons:
- Very little room on the inside
- Won't be able to sit up or stand up
Forester
This design is pretty similar to the bivy bag shelter. But instead of attaching the edge to the tree, you should use a grommet located in the middle part of the tarp.
Or if there are no trees around, you can prop the tent with a stake. In both cases, you'll have additional flaps at the entrance for better weather protection.
Pros:
- Great protection against weather elements
- Can be propped using a pole
Cons:
- A bit difficult to set up
- Not a lot of room inside
The Adirondack Setup
This configuration is basically the lean-to tarp with more weather protection. You start by tying a tight ridgeline around two trees. Now grab your tarp and rotate it in a diamond shape. Place one corner over the ridgeline, then stake it to the ground.
Use prusik loops to attach tie lines to the ridgeline. Then, stake out other corners, all the while keeping the tarp as taut as possible. This setup is very spacious and works in practically any weather.
Pros:
- Offers protection from the elements on three sides
- Great for winter camping with a fire in the front
- Plenty of room to lie down or sit up
- Extendable roof
Cons:
- Complicated setup with toggles, loops, and a prussic knot
- No groundsheet
- Cannot stand up within the shelter
The Envelope
This is kind of like a modified lean-to setup. It also protects you from wind and sun on one side, but it also gives you a floor.
To make this shelter, start by setting up a taut ridgeline. Lay the tarp flat on the ground underneath the ridgeline and stake the outside corners. Attach the other side with tie-outs to the ridgeline. Then, pull the remaining fabric underneath as flooring and secure it with stakes.
Pros:
- Easy shelter setup
- Groundsheet to provide protection from damp ground
- Will provide protection from rain and wind on one side
Cons:
- No protection from wind on one side
- If windy and rainy, you will get wet
C-Fly Wedge
This configuration looks like the one above, with an additional top awning. As the name suggests, it creates the shape of the letter C.
To make this shelter, first make the ridgeline between two trees. Then, lay the tarp on the ground and stake on one side as well as in the middle. Finally, fold the rest over the ridgeline and secure it to the ground.
Pros:
- Good protection from sun, and wind on one side
- Groundsheet/Floor
- Rain protection
Cons:
- Not protected from wind from two sides
- Moderately Difficult setup
- Has a tendency to sag
Diamond Fly or Plough-Point
This configuration offers more protection during strong winds and heavy rain and is perfect for hammock camping. It is easy to setup and is ideal for when conditions are bad and you simply need to hunker down.
Pros:
- More protection from the elements
- Plenty of room for your gear
- Relatively easy to set up
Cons:
- No groundsheet
- No protection on one side
- Can be cold in winter
Hammock Shelter or Diamond Tarp
If you're hammock camping, this configuration is essential to know. In case it blows, rains or even snows, it's the only way you'll stay safe from weather elements.
The setup is pretty simple. Make a ridgeline somewhat above the hammock. Then, fold the tarp over it, so that two ends are on the ridgeline, while the other two point towards the ground. Stake them well.
Pros:
- Ideal weather shelter for hammocks
- Fairly easy setup
Cons:
- Requires 3 guy lines
Also See: Best Hammock Tarps for Hammock Camping
Flat Roof Lean-To
This tarp configuration will give you more coverage than other options on the list. It's a great hideout from sun and rain. It's also pretty easy to make. But you'll need trekking poles or branches to stake out one side.
Start by making a ridgeline between two trees. Then, fold the tarp over it and stake one side to the ground. For the other side, stake poles and attach the tarp to them.
Pros:
- Good sun and rain protection
- Quick and easy to setup
- Lots of room to sit up
Cons:
- Requires trekking poles or branches for pitching
- Can sag during heavy pours
Half Cone Fly
This low-profile shelter is great for keeping you safe from weather elements during the night, but you won't have much room to sit.
Lay out the tarp, with one corner facing the tree. Attach it to that tree on one end, and stake the opposite end to the ground. Stretch out mid points with guylines, and secure them in place. Finally, stake out the edges.
Pros:
- Good protection against weather elements
- Requires a single tree
Cons:
- No floor protection
Holden Tent
This tart configuration is pretty much half a pyramid. It's very simple to make and keeps you protected from sun, wind and rain.
To make it, lay out the tarp on the ground, staking down one side on both corners. Now, find the center point on the opposite side and raise it with a pole. Stake the front corners, while assuring everything stays taut.
Pros:
- Easy and quick to set up
- Good against weather elements
- Don't need a lot of gear
Cons:
- Exposed to wind on one side
- No groundsheet
Square Arch
This is a rather simple design, but you'll need to set up two parallel ridgelines. In case it's raining, make one a bit taller than the other, so that the water runs off.
Start by tying two parallel ridgelines. Then, put the tarp on top of both of them. Finally, stake both sides to the ground.
Pros:
- Easy to make
- Good sun and rain protection
- Wind protection from two sides
- Room to sit up in
Cons:
- Open to wind on opposite sides
Half Box Shelter
This tarp configuration only uses poles, so it's great for camping on the beach or in a field. But it's a bit harder to make than most shelters on this list. It will take you a try or two to master it.
Fold the tarp in half, then stake one corner and in the center. Now make a 90-degree angle around the stake in the middle, and stake another corner to the ground. Finally, add trekking poles or branches into the ground on each of these corners, and fold the tarp to create the roof.
Pros:
- Good sun, rain and wind protection
- Doesn't require trees
Cons:
- You'll need poles or branches
- A bit difficult
Basic Fly Line Roof
This is the ultimate protection from the sun. However, it won't do much for you during bad weather. It's easy to set up, but you'll need to find four trees close enough so that you can tie your ridgelines.
Basically, you need to tie two ridgelines so that they make an X sign. Then, put the tarp above and tie each corner to the ridgeline below it.
Pros:
- Good sun protection
- Easy to setup
Cons:
- Doesn't protect you from wind
- Will sag when raining
- Requires poles or 4 trees
Basic Patrol Dining Fly
In case it rains, flat roof configurations won't work, as they'll sag under the weight of water collecting. In that case, dining fly is ideal. However, it's a bit harder to make, especially without the help of another person.
Lay out the tarp on the floor and attach a guyline to each corner. Add stakes five feet away and at an angle of 45 degrees from each tarp corner. make a taut-line hitch between the stakes and the corners.
Now tie stakes in the middle on both wide sides of the tarp. As you raise the stakes, the tarp will become taut. Set them up in a straight position, and secure them to the ground.
Pros:
- Great protection against rain and sun
- Lots of room underneath to stand up
Cons
- Difficult to set up
- No protection against wind
- No groundsheet
Beginner's Guide To Tarp Camping
Tarp camping doesn't have to be challenging for a newbie, but there are a few things you should keep in mind before trying out that new adventure.
Gear you will need to make a tarp shelter
Just like non-freestanding tents, a tarp shelter needs tension to stay up. If you've never done it before, you can expect a bit of trial and error before you get the hang of it.
A few things are a must:
- A tarp
- Paracord
- Tent Stakes or anchor alternatives (i.e. rocks)
- Trekking Poles (optional)
- A tarp configuration plan
Choosing A Pitching Spot
No matter how taut your tarp might be, you should still pitch it in a somewhat sheltered place. That way, the surroundings can give you slight protection from weather elements. Closeby trees also allow you to set up a ridgeline and create a sturdy structure.
What I've learned from experience is that the best place to set up a tarp would be on slightly sloped ground. Why? Well, in case it rains, water will run downhills instead of creating a puddle right underneath you.
Learn Camping Knots
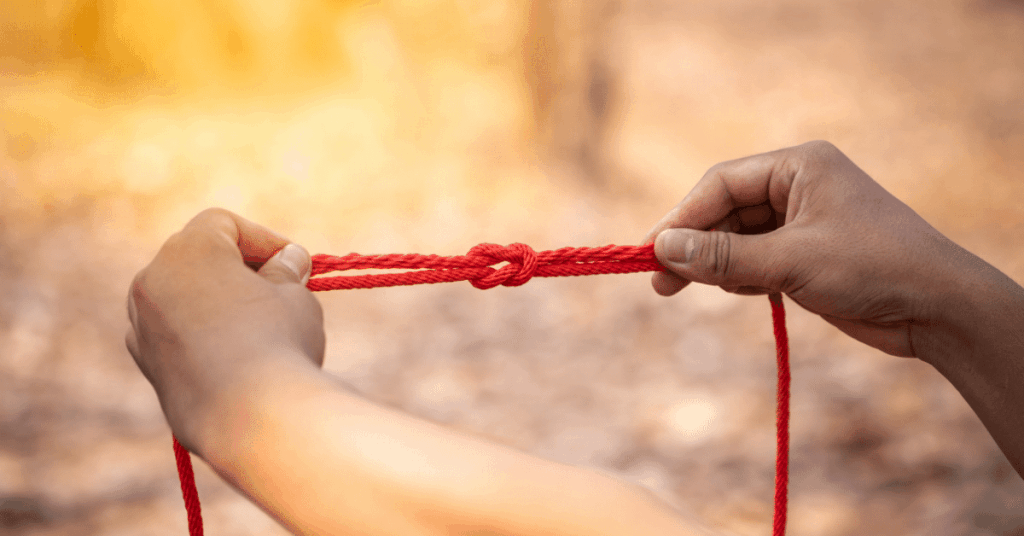
While you might get by not knowing basic camping knots when using a tent. That won't work here. You need to be able to tie and untie the rope with little effort, yet the knot shouldn't slip by itself under tension.
But first, you need to know some essential camping knots. Why are they so important? Well, because your tarp needs to be taut. Otherwise, it will sag in the wind and collect water as soon as it starts raining.
Select which tarp configuration you will use
Once you have all of your gear in mind, you can determine which tarp shelter configuration will be best for you.
Since there are so many ways you can set up a tarp shelter, how does one choose which one is the best?
Well, that depends on a lot of things, so let's cover them all briefly:
Weather And Geography: These factors play a huge role in choosing the best tarp shelter setup. During hot summer days, you want to use a configuration with decent airflow. But during the rainy season, having a fully enclosed shelter is a bigger priority.
By geography, I mean the place you're camping at. So for instance, if you plan on camping on the beach, you'll need trekking poles and stakes to set up your shelter.
Tarp Dimensions And Types: One thing you definitely don't want is to arrive at the campsite only to find out your tarp is too small for your needs. However, the good thing about tarps is that more is better. So if you're in doubt, go for a bigger one. Generally, you want to have at least 15 square feet of area per person.
As for the type, tarps can be either flat or shaped. A flat tarp is rectangular and has 90 degrees angles in corners. The simple shape makes it a good all-rounder that can be set up in different configurations.
A shaped tarp has a curved ridgeline or edges. While you can't be as creative with configurations as with flat tarps, a unique shape has its advantages. For instance, pyramid-shaped tarps are great for high winds and heavy snowfall.
Tarp Requirements: Not all tarps are the same. When choosing the right model, there are a few features to pay attention to. In this section, we'll briefly touch on each of these characteristics.
- Materials: Tarps are made of different materials, the most popular being Silnylon, Dyneema, Poly and Tyvek. They all have pros and cons. So for instance, Silnylon is lightweight and waterproof, but not breathable. Dyneema is even lighter but way more expensive. Poly, on the other hand, is rather affordable, but it weighs more than other materials. Finally, Tyvek is light, breathable and affordable, but bulky when packed.
- Shape: Aside from rectangular, tarps can also be diamond-shaped and hexagonal. So which one is right for you? A rectangular tarp is vanilla. It's an all-rounder that can be pitched in different configurations. Diamond-shaped tarp offers less coverage but better airflow. This shape is more suitable for camping during hot months. Finally, a hexagonal tarp is a middle ground between the first two in terms of both weight and protection.
- Amount Of Tie-Outs: Your tarp should have at least four tie-out points, on each corner. But the more the merrier. Ideally, you want a tarp to have tie-outs on borders and corners, as well as on the middle part.
Why Use a Tarp Shelter?
The main reason you should ditch the tent and use a tarp shelter instead is – weight.
As a rule of thumb, even lightweight tents are about double as heavy as tarps. After all, a tarp has way less material. Some models weigh as little as 5 ounces. No tent can beat that.
Another reason you should choose a tarp is its flexibility. There are tons of different ways you can set up a tarp shelter, depending on the weather conditions and the camping location.
Finally, a tarp is way cheaper than a tent. You can run to the store and get a utility tarp for a few bucks. Who said camping must cost a pretty penny?
Who Benefits From Tarp Camping?
As you can see, weight and storage space are the main advantages of using a tarp as a shelter.
And as you know, backpackers and thru-hikers value these features above all else. What's more, flexibility is also high on their list.
When you're spending a long time in nature, you want to be able to adapt to whatever conditions you experience.
Additions for Tarp Camping
While tarps are amazing, they're not flawless. But since you're saving up on storage space, you can pack additional things that will make your camping trip as comfortable as possible.
Bug Net: My biggest issue with using one has got to be a lack of insect protection. As a mosquito magnet, I can't imagine sleeping without a mesh wall that's keeping those annoying pests away.
There are tons of bug shelter models on the market, so you can easily find something that suits your tarp size. Just keep in mind that a bug net will definitely increase your pack weight. But if you simply can't stand bugs, additional bulk is a necessary compensation.
Footprint: The great thing about tarps is that they can serve as footprints too. Some configurations on this list also cover the floor, giving you a nice protective layer between you and the ground.
However, most setups don't, so I'd advise bringing either an additional tarp or a footprint to create that necessary barrier from the cold terrain underneath.
Trekking Poles: If you're camping outside of the woods, you might not find trees suitable for setting up a ridgeline. In that case, trekking poles can do the job just as well. And given how useful they're for walking, you're practically killing two birds with one stone by bringing them on your camping trip.
Bivy Sack: Bivvies go hand in hand with tarps. They offer a bit more privacy and weather protection while adding only a tiny bit of weight. You don't have to use them both at all times – but if the weather gets too bad, a bivy will help you stay warm and dry.
That's All Folks!
Now you know everything you need to use the tarp as a camping shelter.
Mastering the skill does take some practice, but once you start experimenting with different tarp setups, you'll get hooked – trust me.
1 thought on "20+ Best Tarp Shelter Configurations for Easy Tarp Camping"
A tarp pitch can be the best 4 season shelter.
It has to go tight to the ground on all sides and have a wood stove inside if it is going to be any good I a winter blizzard. The whole outfit cannot weigh more than 4 lbs. if backpackers are going to use it. A 10'x10' tarp only needs to be pegged on the 4 corners with as many pegs as it takes to be secure in any wind. No grommets are needed. It has space for 2 cooking or 4 sleeping. The chimney can serve as a corner pole. All sides can be raised forming an umbrella to cool off, heat from the stove or summer sun.