

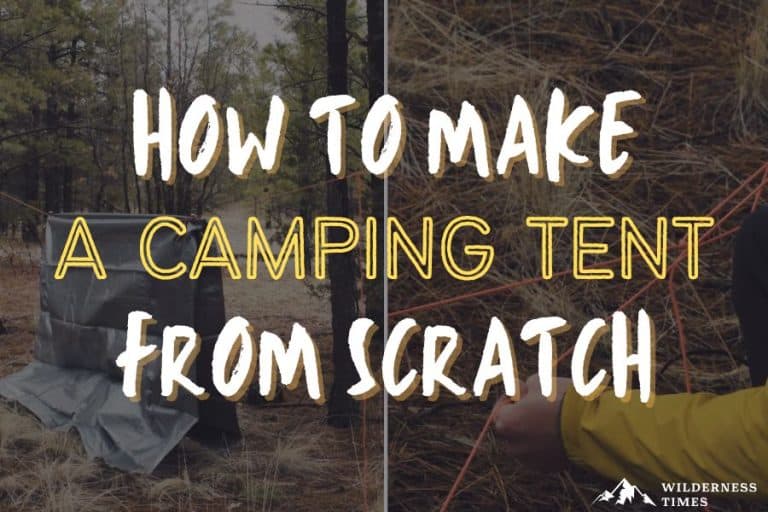
A good tent can be expensive. Like, really expensive.
You know what's super cheap, though?
Making one yourself!
If you're not a DIY-fixer/builder-type-person, don't worry. You don't have to be.
Building your own tent isn't just cheap – it also couldn't be easier. With just three basic items, you can create your own shelter in no time at all.
So, ready to learn how to make a camping tent from scratch for your next camping trip? Let's get started!
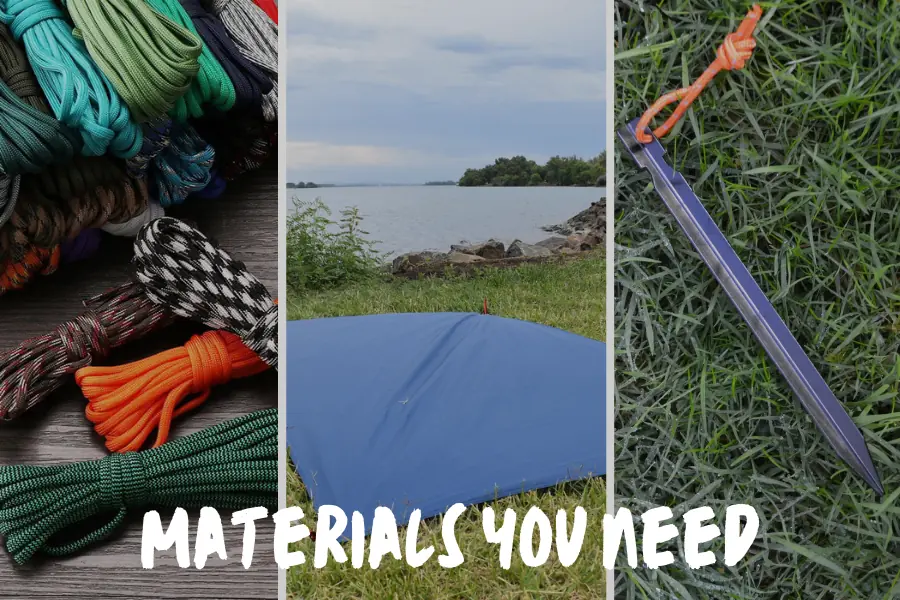
Materials You Need
You'd think that there would be a lot of different components needed to make your own makeshift tent.
You'd be wrong.
As it turns out, all you need are:
- 1 tarp (2 if you want a groundsheet)
- 4 sticks/tent stakes
- 20+ feet of paracord rope or bungee cord
And that's it!
Once you've gathered these things, you've got everything you need to make a camping tent from scratch.
Picking The Best Spot

Before you can start putting your DIY tent together, you need to find a suitable camping spot.
So, what should you look for to find the perfect campsite?
First of all, you want to make sure the terrain isn't too hard. But, you don't want it to be too soft, either.
That being said, too soft is better than too hard. If you're building a tent on sand, you'll just have to drive your stakes deeper into the ground.
The next thing you should always keep in mind when picking out a campsite is protection from the elements.
Is there enough natural shade to shield you from the blazing sun?
How about a natural windbreak – like a line of trees – to protect you from the wind?
And finally, is the spot you've chosen dry enough, or is there too much moisture?
You'll want to look for places that are higher up, because they'll be a lot drier than spots that are closer to water level.
You'll have less mosquitoes to deal with, too – so that's a bonus.
How To Build A Camping Tent From Scratch
Okay, so you've gathered your materials and found the ideal spot.
It's time to get building!
Whether you want to make a dome tent, a bell tent, or a tunnel tent – it's all doable. But I'll focus on setting up a simple A-frame structure.
Here's how you're going to do it:
Step 1: Tie Your Ridgeline
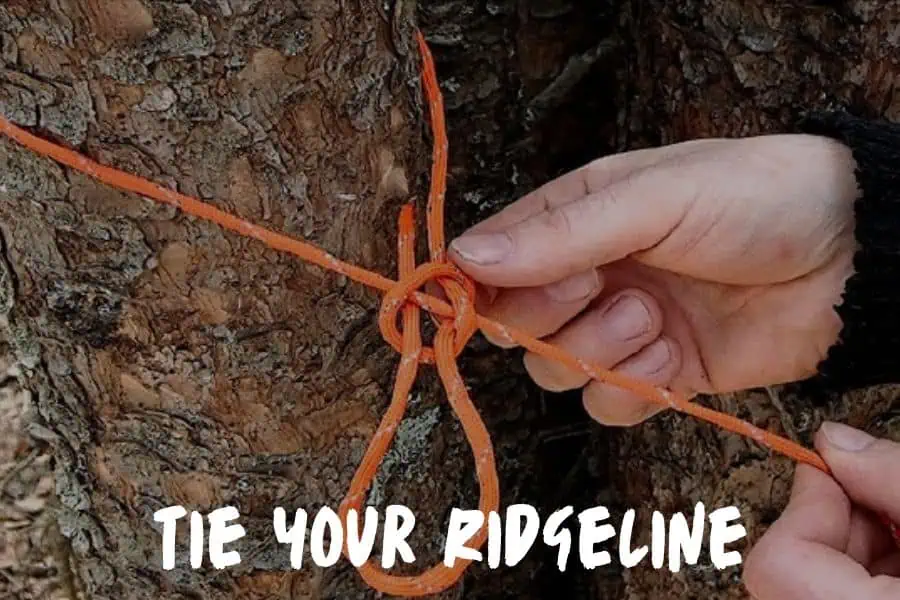
Find two trees that are around 10 feet apart and tie a piece of paracord between them to be your ridgeline.
The length of your tarp determines how high up you should tie the cord. The tarp needs to be able to reach the ground on both sides, so make sure it isn't too high or you'll have gaps.
Step 2: Lay Out Your Footprint
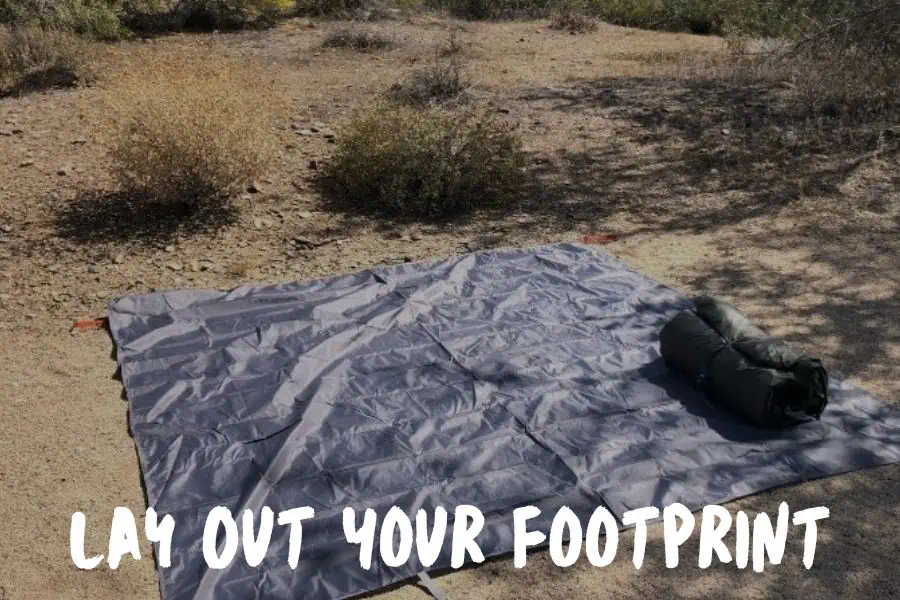
Now, lay your first tarp out flat between the two trees underneath the ridgeline.
This will be the base of your DIY tent, otherwise known as the tent footprint or groundsheet.
You'll need to make 4 holes – 1 on each corner of the tarp. These are for your stakes.
Measure the diameter of the stakes you're using, and make sure the holes you cut are smaller than that.
Step 3: Make Some Holes For Your Poles
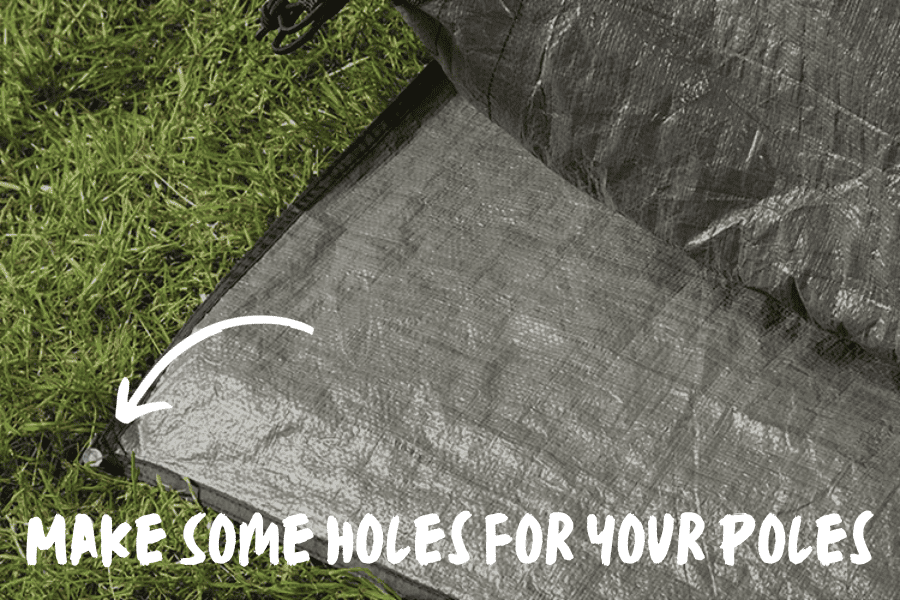
On your other tarp, make the same size holes in all 4 corners.
Now, take your paracord and cut it into 4 pieces, each one roughly the same length. Thread 1 piece through each hole, so you can use them later on to tie your poles to the tarp.
Step 4: Put Your Walls Up
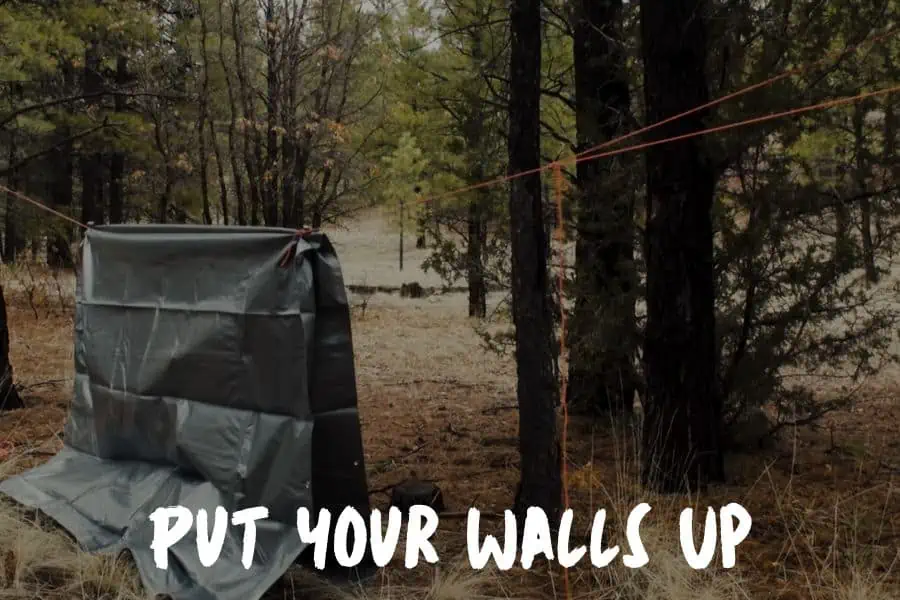
Here comes the moment of truth.
It's time to erect the walls of your tent.
To do this, take the second tarp and hang it over your ridgeline.
Step 5: Stake Your Tent Down
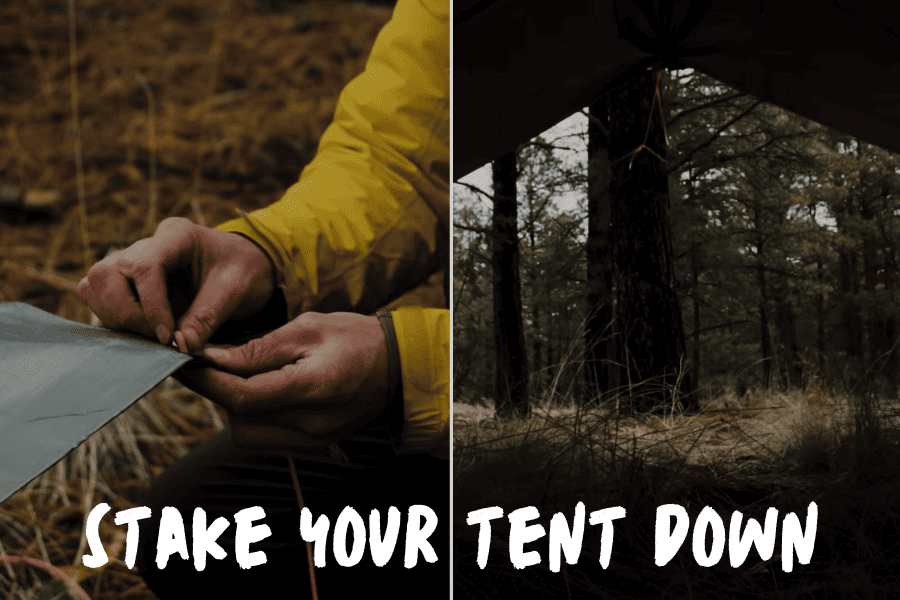
Next, it's time to stake your tent firmly into the ground.
Align the holes on your groundsheet tarp to the holes on your top tarp.
Then, push your 4 stakes into these holes, and drive them firmly into the soil.
It's best to do this with a mallet. If you've taken my campsite selection advice on board and found a spot with the right kind of terrain, you should be able to drive them in pretty easily.
At this point, your tent should take shape. If you've done everything up until now correctly, your tent should look like a triangle.
This type of structure is great because it allows water to slide right off, so you won't have any issues if it rains. As long as you're using a waterproof tarp, that is.
Step 6: Tie Everything Together

Now all that's left to do is tie everything up tightly to secure your structure. If you've taken the time to learn a couple of basic camping knots, they'll come in handy right about now.
If not, oh well! Just tie a double knot; it'll be fine.
Remember those pieces of paracord we tied to the corners earlier?
Use those to tie the corners of the top tarp to your stakes, securing them to the ground.
Another way you can keep them down securely is by placing a heavy rock on each corner of the tarp, if there are any nearby.
Step 7: Test The Strength Of The Structure
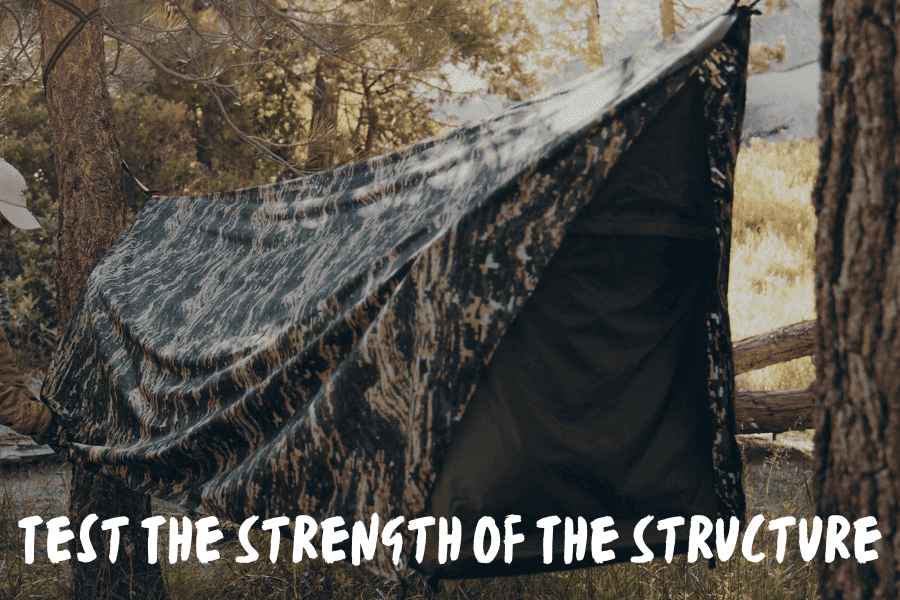
And, finally, before you get all cozy and tucked in, it's a good idea to check the strength of the structure you've made.
You know, to make sure it doesn't collapse on your head in the middle of the night.
So, how do you test your new tent?
Just double check all your knots to make sure they're tight and secure.
Then, push lightly on each pole, to make sure none of them are wobbly or loose.
And that's it! You're all ready to set up your air mattress, and the rest of the campsite.
FAQs
What Materials Do I Need To Make A Camping Tent From Scratch?
At the very least, you'll need three things: a tarp, a 20′ paracord, and tent pegs (or sticks). Of course, you can use more guylines to ensure the tent is stable, as well as an additional tarp to serve as a tent floor.
How Many Types Of Tents Can You Make Yourself?
The great thing about a tarp is that you can set it up in numerous ways to create a different type of shelter.
From classic A-frame and lean-to constructions to C-fly wedge and Adirondack set-ups, there's a suitable shelter for any situation.
How Do I Choose The Right Size Tarp To Make A Tent?
Tarps come in different shapes and sizes. For a solo camper, a 9' x 9' tarp is more than enough for making a shelter.
If you need a larger tent, consider the number of people you're making a shelter for.
What Type Of Tent Design Is Best When Building Your Own Tent?
In most cases, simple set-ups, like an A-frame or a lean-to tarp will work just fine. Both are quick and easy to set up, and they provide decent weather protection.
What Kind Of Tarp Should I Get To Build My Own Tent?
That depends on what you consider to be the most important factors. If you're worried about weight, then silnylon is a great option. If you care most about durability, go with a polyethylene tarp.
And There You Have It!
Now you know how to make a camping tent from scratch!
Just like that, you've got a brilliant shelter that you've built with your own two hands. Whether you're backyard camping or venturing off on an adventurous camping experience, you have a sturdy homemade camping tent to keep you safe and warm.
Pretty sweet, huh?
And the best part is – it barely costs you anything! If you want to get really advanced too, check out our tarp shelter configurations article to see over 20+ different ways to make your own tent.
For more tips on how to save money on camping gear, and other ways to stretch your dollar while camping, check out this article I wrote on camping on a budget.
More On Budget Camping Tents Below!
- Best Budget Sleeping Bags of 2026 ($29.99 & Up)
- Best Budget Backpacking Tent of 2026 (Top Picks Under $100 & Under $200)
- Best Tent Under $100 (Budget Camping Made EASY)
1 thought on "How To Make A Camping Tent From Scratch (Building a DIY Tent)"
I've just finished reading your post and I'm thoroughly impressed! Your step-by-step guide is not only informative but also incredibly engaging. The way you've broken down the process into manageable steps makes it seem achievable, even for a novice. Your tips on choosing the right materials and tools are particularly helpful. This post is a testament to your expertise and creativity in outdoor adventures. It's sure to inspire many readers to embark on their own DIY camping tent project.